Dragon Age: The Veilguard has had a bit of a turbulent development history, but 10 years after the release of Inquisition, it's finally here to continue the story of Solas and the elven gods.
There are also plenty of side quests to take on, puzzles to solve, and items to collect in Dragon Age: The Veilguard, so to help you out on your journey across Thedas, we've got an in-progress Dragon Age: The Veilguard walkthrough below with links to all our guides, and a few tips and tricks.
If you're still not sure whether it's been worth the 10 year wait or not, then make sure you check out our Dragon Age: The Veilguard review.
Although we've spoiler tagged where we thought it necessary, please be aware of some minor spoilers if you're reading past where you are in the story!
On this page:
- Dragon Age: The Veilguard walkthrough
- All our Dragon Age The Veilguard guides
- Tips and tricks
Dragon Age The Veilguard walkthrough
With links to other guides when applicable, here's our in-progress Dragon Age: The Veilguard walkthrough:
Introduction
- The End of the Beginning - Find Neve Gallus, then find Solas and stop the ritual.
- Shadows of Ancient Arlathan - Explore the Lighthouse, then investigate Solas' ritual site.

Signs and Portents
- In Entropy's Grasp - Find Bellara Lutare, then help her deactivate the artifact.
- Shadows Crossing - Travel to D'Meta's Crossing to find the missing Veil Jumpers.
- Choose to leave or save the mayor.
- The Singing Blade - Find and retrieve the lyrium dagger.
- The Enemy of my Enemy - Place keepsakes in your room, then speak with the Dread Wolf and consult with the team.
- Into the Crossroads - Investigate the Crossroads to get to Treviso or Dock Town.
- Sea of Blood - Go to Treviso to recruit the Demon of Vyrantium (Lucanis).
- Blood Vault crystal locations.
- The Smuggled Relic Case - Contact the Shadow Dragons and track down the relic.
- The Labs Below - Explore the past and escape the prison to get a wolf statuette.
- Friends in Hidden Places - Talk to Neve.
- Shadows of Minrathous - Find the Shadow Dragons in Dock Town and investigate the Anvallenim.
- In Peace, Vigilance - Gain help from the Wardens.
- A Warden's Best Friend - Meet Harding's Warden contacts.
- Make a major decision: Help Minrathous or Treviso.
- On Blighted Wings OR On Deadly Wings (dependant on what decision you made at the end of 'A Warden's Best Friend') - Stop the dragon.
- Completing the Veilguard - Consult again with Solas, then talk to Harding and Bellara.
- The Dragon Slayer - Travel to the Rivain Coast and recruit the dragon hunter.
- Where the Dead Must Go - Find Emmrich in the Grand Necropolis.
- Shades of the Blight - Meet Morrigan at the Cobbled Swan.
- Something Wrong - Travel to the Hossberg Wetlands and investigate the blight.

More to come...
All our Dragon Age The Veilguard guides listed
Beware of spoilers below! Separated by type, here's a list of all our Dragon Age: The Veilguard guides:
Companions and romance
- All companions and how to get them
- Romance guide
- How to increase companion Bond
Skills and equipment
- How to respec
- Skill Tree explained
- How to transmog
- How to upgrade equipment
- How to enchant equipment

Character customisation
- Best class
- Best faction
- Character classes explained
- How to change appearance
Side quests
- How to perform Rite for Spirits of the Dalish quest (Arlathan Forest)
- Artifact Vault Power Crystal locations for Echoes of the Past quest (Arlathan Forest)
Story puzzles
- How to power the door in Entropy's Grasp quest (Arlathan Forest)
- Blood Vault crystal locations in Sea of Blood (Ossuary - started in Treviso)
Decisions
Other
- Factions explained
- How to change party
- How to open 'currently inaccessible' doors
- PC requirements
- Trophies and Achievements
Dragon Age The Veilguard tips and tricks
Here are some handy tips and tricks for Dragon Age: The Veilguard:
- Smash everything - Boxes, vases, and other types of objects unique to an area contain gold and resources required to level-up equipment. They also might be hiding codex entries and other goodies underneath them, so get smashing! If you're a mage, the quickest way to break a room full of these objects is to use your laser-like ability, but if you're a rogue, then dashing is more timesaving than swinging your weapon at each one.
- Be mindful of who you sell your valuables to - If you want a way to gain Faction Strength with multiple Factions, then don't sell all of your valuables to just one vendor. However, if you do want a quick way to gain a lot of Faction Strength somewhere, then hit that 'sell all' button!
- You can see the immediate consequences of your decisions - Not sure if you've made the right choice? Thankfully, you can reload any major decision with the 'Temporary Decision Save' system. These are created automatically, so there's need to worry about them while you're actually making a choice.
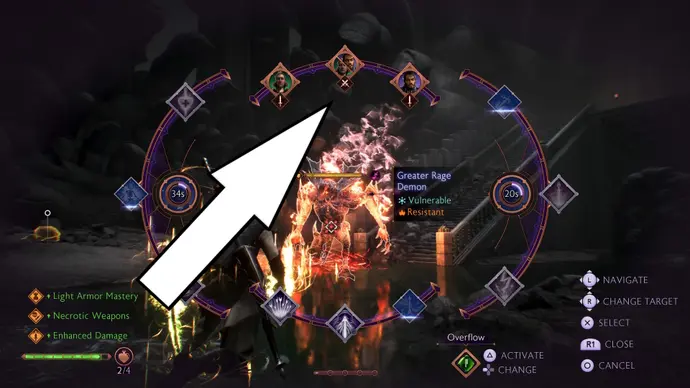
- Remember to manually direct your companions' attacks for skill boosts - Your companions have passive buffs that are applied when you use the combat wheel to direct them to attack a particular enemy (the three options located at the top-middle of the wheel). You can also equip weapons and armor that specifically buffs this 'Attack my target' skill.

- Pay attention to the symbols under your minimap - These blue icons show you if something like a big chest or Fen'harel Altar is nearby. You'll also get a little dinging sound to go along with the symbol.
- Check you settings - There are lots of useful toggles and sliders in the settings menu for things like turning off motion blue, making parrying easier, hiding your helmet, increasing text size, locking the minimap rotation - and more!
- Area 'currently inaccessible'? Keep playing! - These doors, hatches, and barriers are unlocked through story and side quest progression. So just keep working your way through the quests in your journal, and you'll eventually unlock them all.
- Hold off on upgrading the Caretaker's Workshop rank too much at the beginning - You get a discount later on (after recruiting all of the companions) for completing the wisp puzzle in the music room (which is unlocked by completing the rotating statue puzzle at the Lighthouse). While you do need to increase the rank of the Caretaker's Workshop to upgrade your equipment, it can be a waste of Caretaker's Power if you continue to upgrade it past what you need at the time. Waiting can save you a lot of Caretaker's Power in the future.
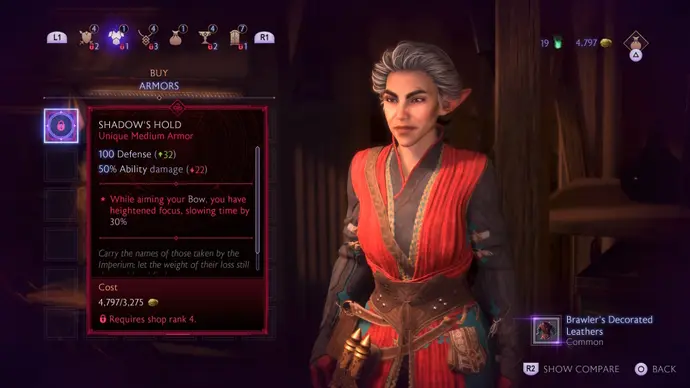
- Go hunting for 'Unique' equipment - These red-coloured weapons, armor, and accessories are some of the best in the game, and all have 'unique' effects that can help you narrow down a build. They can be bought from merchants, rewarded from killing certain formidable bosses, found in big chests that require you solve a complicated puzzle first, and from completing quests like the Hall of Valor. It takes a little work to get them, but it's worth it!

- Don't forget to talk to your companions at the Lighthouse - A clock icon means this companion's dialogue will time out if you progress too much in the story, and an exclamation mark means they have a quest for you. Also, if they're not in their usual positions, your companions will have some unique dialogue to share with Rook and other companions in the vicinity.
- Take advantage of companion skills that work together - You and your companions can apply a 'Primer' to enemies with certain skills and attacks, that can then be 'Detonated' by another character to cause even more damage. These Primers come in two forms: Weakened and Sundered. So during party selection, make sure you check your companions' abilities to see what skills they have that can Prime or Detonate.
- Buy stat boosts and gifts from merchants - Items like 'Dragon's Bounty' can be bought to permanently increase your health, and gifts are found at each Faction's merchant. These gifts give you a quest to hand them over to the right companion, which increases their Bond. Some vendors become inaccessible later on in the story, so we recommend you buy these stat boost items and gifts as soon as you see them.
- Unsure about combat terminology? Check the Glossary! - If you can't tell your Blighted from your Bleeding, or what the hell Bees is supposed to mean, then make sure to check out the Glossary menu in the 'Library' tab. It details exactly what each combat effect does, and also has a handy lore glossary for those new to the Dragon Age universe, or just need a refresher.
- Target an enemy's weakness - If you're a mage, make sure you bring along two different elemental types of weapon, so you can switch to enemies' weaknesses on the fly. Or at least, an element they aren't resistant to. For other classes, it's best to aim for the head most of the time, as this will be their weak point. Some of the more unique enemies have other weak points, like their feet, or noticeable growths.
Hope you have fun playing Dragon Age: The Veilguard!
