Running out of materials just when you need them most — sound familiar? In Once Human, it’s a struggle every survivor knows too well. The good news? You don’t have to live that way. By building a nearly self-sufficient acid farm, you can keep your resources flowing while you focus on exploring the wastelands. In this guide, we’ll dive into where to find contaminated plants, which crops deliver the best yield, and how to set up a smooth-running acid farm.
Best Contaminated Crop and How to Get It

The saying “something is better than nothing” couldn’t be truer when it comes to contaminated crops. At the start of your farm, your top priority is collecting as many Contaminated Plant Seeds as possible. While there’s no guaranteed method to increase seed drops in the wild, you can maximize your chances by scouring Stardust Polluted areas like the one near Chalk Peak’s lakefront in the northwest corner of the map.
Once your farming system is up and running, the most efficient crop is Contaminated Aloe Vera. Why? Its crop-to-acid ratio is unmatched: you’ll only need 2 Aloe Vera to produce 1 Acid, compared to 3 from other contaminated crops. However, this payoff comes with a small challenge; Contaminated Aloe Vera requires a narrower irrigation range (60–90 instead of the usual 50–100). But don’t worry! With the right setup, this can be easily managed. (We’ll cover irrigation tips shortly.)
Best Acid Farm

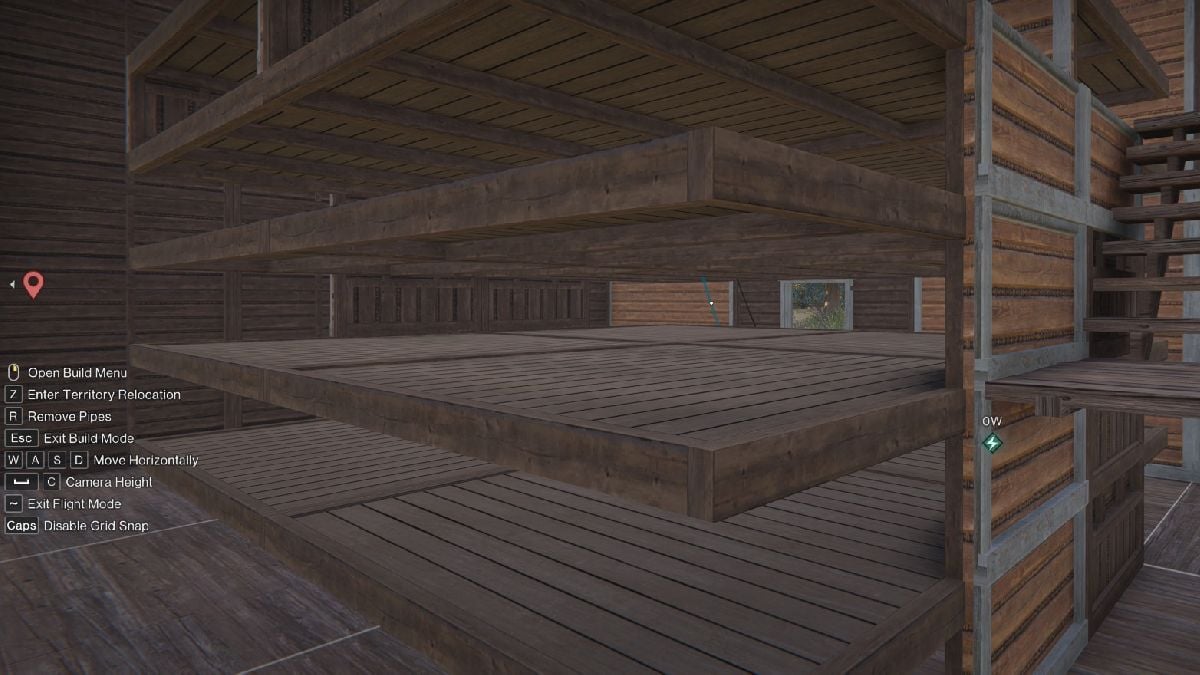
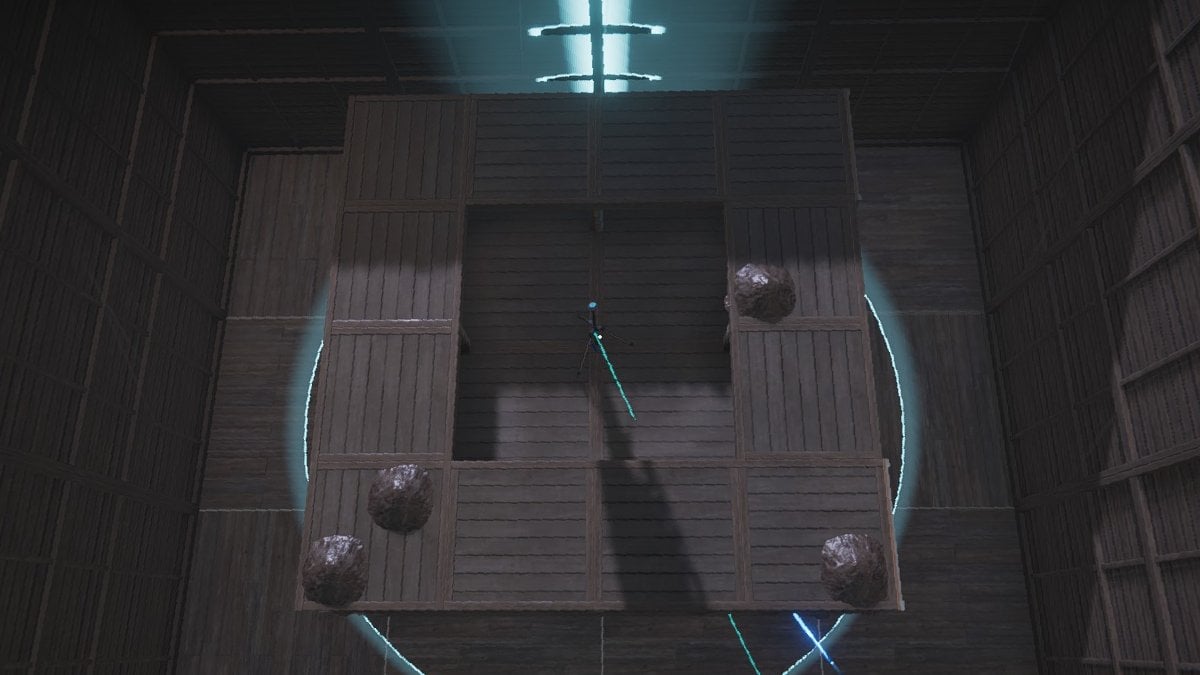
The secret to building an efficient farm is making the most of your Territory’s vertical space, especially since horizontal space is quite limited! More importantly, the farm needs to appeal to Contaminated Crops in low light and high irrigation conditions. Before diving into the setup, let’s review the materials you’ll need to get started.
Acid Farm Build Materials
- 1/4 Wood Ceiling / Wood Ceiling
- 1/4 Wood Ceilings offer more precision in wall placements, allowing for more compact and efficient builds—ideal for players looking to optimize space. For a more casual or resource-light farm, regular Wood Ceilings work just as well and are less fickle to build with.
- 1/8 Wood Wall
- 1/8 Wood Walls are used for creating the acid farm tower “floors”.
- Walls and Ceilings
- The choice of material here is up to you, but their main job is to enclose the area, preventing natural light from getting in and providing a controlled environment for your crops.
- Loamy Soil / Planter Box
- Loamy Soil is a great space-saving option and produces more crops overall, but it grows them slower compared to Planter Boxes. If speed is your priority for farm production, Planter Boxes are the better choice.
- Irrigation Tower
- Since your farm will be enclosed, you’ll need an Irrigation Facility to keep the crops watered. This is essential for maintaining your farm’s efficiency.
- Water Tank
- A Water Tank is where the Irrigation Tower draws its water from.
- Water Pump (optional)
- A Water Pump is only necessary if your Water Tank is positioned below the Irrigation Facility. It helps move water where it’s needed if gravity isn’t on your side.
- A Power Source (at least 3W)
- Your system will need a minimum of 3W of power: 2W for the Irrigation Facility and 1W for the optional Water Pump.
- Isolated Securement Unit
- This is your Growshroom’s home, where you’ll manage seed and fertilizer distribution to keep the farm running smoothly.
- Growshroom Deviant
- Your Growshroom is the heart of the operation. They plant, fertilize, and harvest on your behalf.
- Brewing Barrel
- This is where the Acid is made.
Step-by-Step Guide to Building Your Acid Farm
- Determine Farm Size
- The size of your farm is up to you. For min-maxers, consider building a compact shed exclusively for the acid farm. Since your Growshroom manages the farm, you don’t need direct access to every soil plot.
- Set Up the Base Structure
- Place at least 2 1/8 Wood Walls either near the center or along the edges of your farm space. This creates the foundation for your “floors.” Then, fill the space with your chosen soil.
- Build Up
- Use ceiling tiles to build your next “floor.” Repeat steps 2 and 3 until you’ve built up to your second last floor.
- Note: The higher your farm, the longer it takes for the lower levels to irrigate. Proper Water Tank upkeep ensures soil remains irrigated once it reaches the desired level. Without it, poor irrigation can lower farm efficiency.

- Install the Irrigation Tower
- Place the Irrigation Tower in the center of the floor, then build your final “half” level around it.
- Connect Power and Water
- Attach the Irrigation Tower to a Power Source.
- If your Irrigation Tower is above the Water Tank, connect it to a Water Pump, which then links to the Water Tank. If they’re on the same or lower level, you can connect the Irrigation Tower directly to the Water Tank and let gravity do the work. Don’t forget to fill your Water Tank!
- Prep the Growshroom
- Put your Growshroom in an Isolated Securement Unit. Assign it the task of planting Contaminated Crops and applying Fertilizer.
- Fertilizer Options:
- Breeding Boost for more seedsYield Boost to increase crop returns over timeGrowth Boost for faster growth, though the Yield Boost is better for long-term efficiency.
Once your crops are ready, your Growshroom will harvest them for you.
- Brew the Acid
- Use a Brewing Barrel to convert your Contaminated Crops into Acid.
And that’s it! Your Acid Farm is ready to keep your supplies stocked.
To evolve your Once Human acid farm even further, find out how to get a Shiny Growshroom by checking out All Shiny Deviant Locations and Stats on Pro Game Guides.
