Garten of Banban series has become extremely popular in the horror mascot genre of games, despite a lot of debate whether these plentiful of episodes are actually good or not. If you're like me and got pleasantly surprised by the origin story, here's the Garten of Banban 0 walkthrough to help you solve all puzzles, as well as get all collectibles and achievements.

You start off the game in a room at the Kindergarten where you will be asked to answer some questions on a screen. It really doesn't matter which answers you pick, but if you want to anger whoever is behind the screen, you can choose the options that don't align with what you should be feeling: You remember your name, you know where you are, etc.
Once you answer all questions, you'll get a Blue Keycard. People who have played other Garten of Banban episodes will be familiar with these, but for the ones who are new to the games, these keycards unlock doors that are lit up, and only the ones that they match in color.

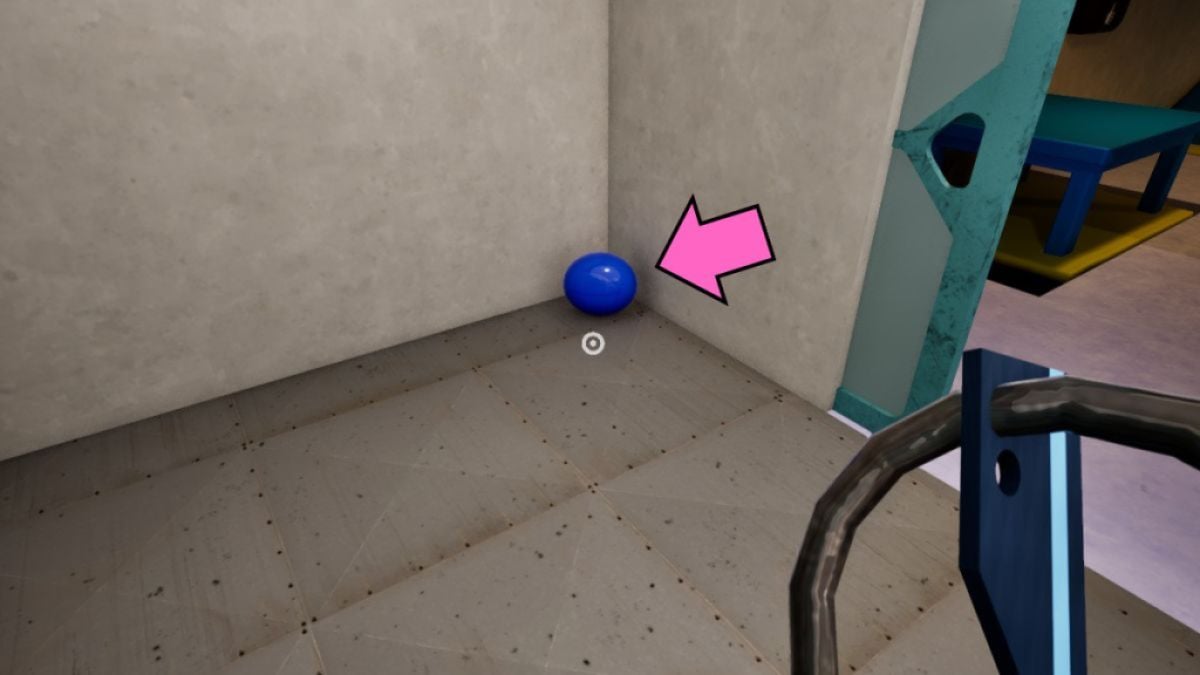
With the keycard in hand, a ''friend'' will join you in your room, called only Case 6, but that we know is actually Banban. He'll give you a keyring and invite you to the common area. Don't follow him just yet, instead go to the right in the hallway and you'll see a blue spheric item on the ground. This is a keychain collectible that you can get in the form of a character. There are total of 9 of them in the game. Pick up the Keychain 1, then head back
In the common area, Banban will tell you to make friends other than him. You can make a total of five in this area and here's how to do exactly that.
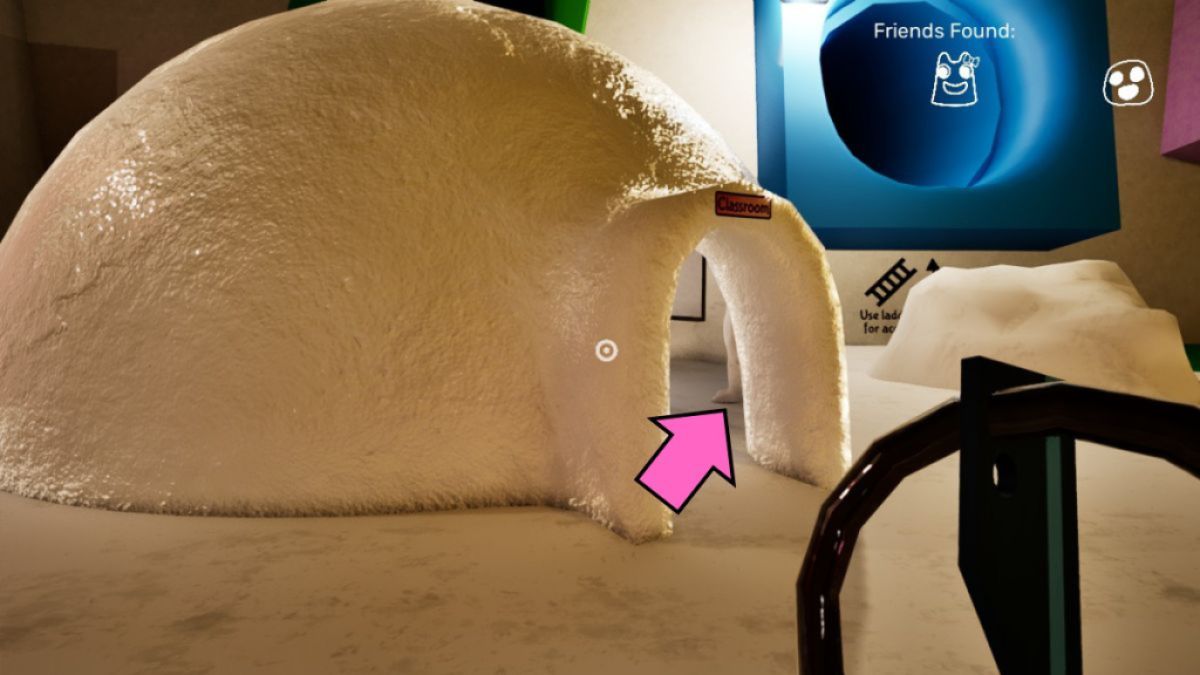
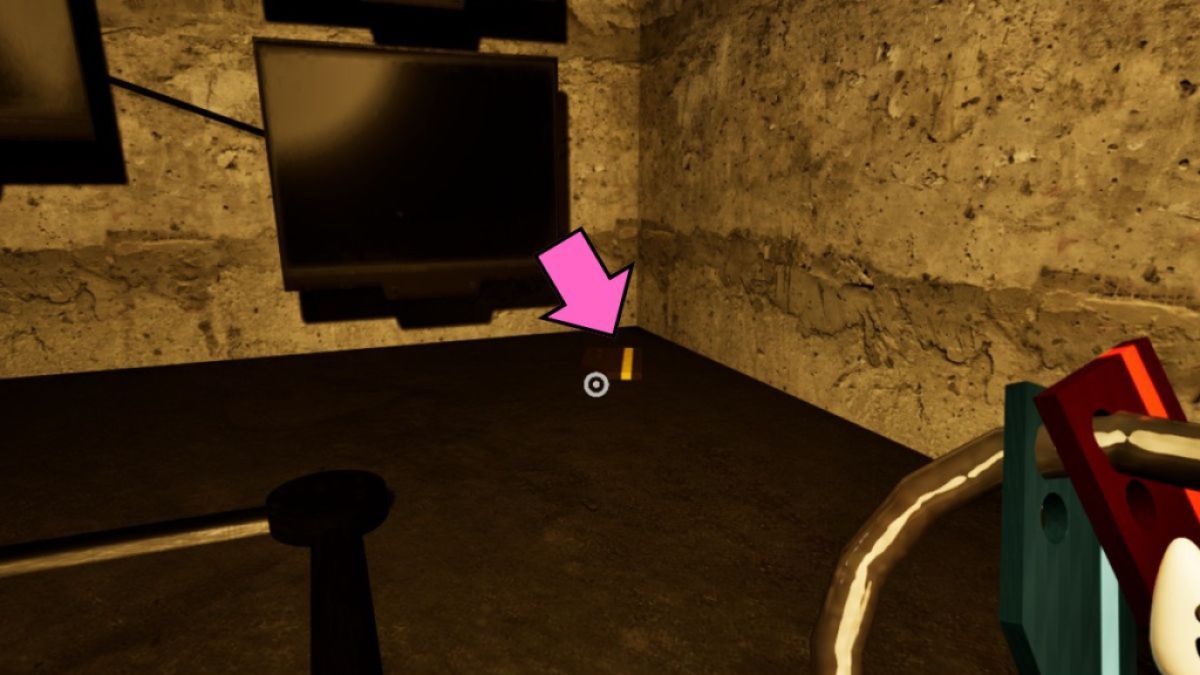
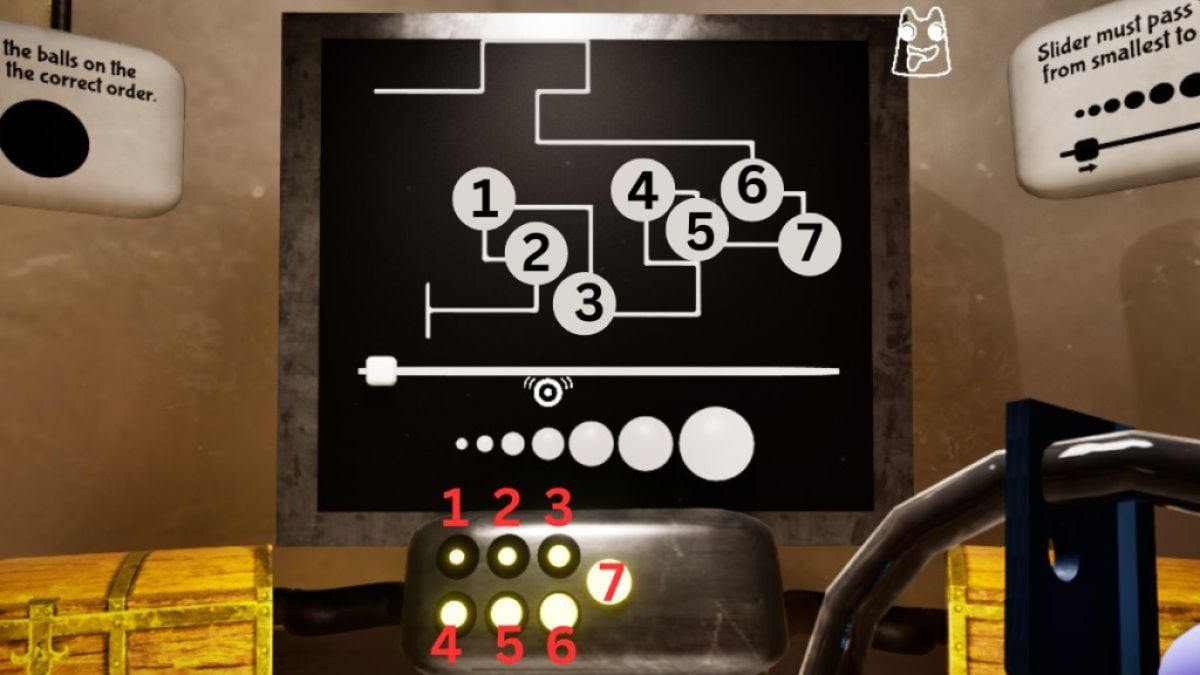
First, talk to Case 7 (Banbalena) and she'll refuse to be your friend. Instead, head to the Exam Pod. To make friends with the Exam Pod Blob, you have to solve the slider puzzle.
The slider goes directly from left to right, but the lines above and the dots where you place the balls are scattered around. The Slider needs to pass through the balls exactly from smallest to biggest. The solution to all three tests, including a secret fourth one are in the images below.
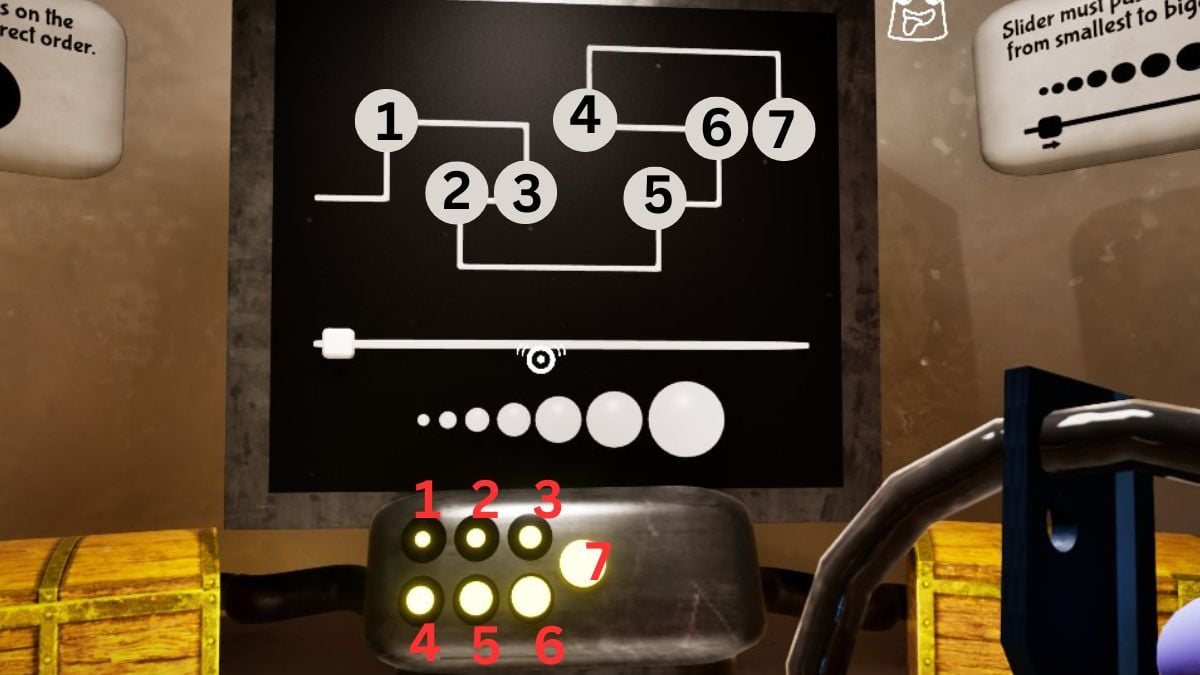
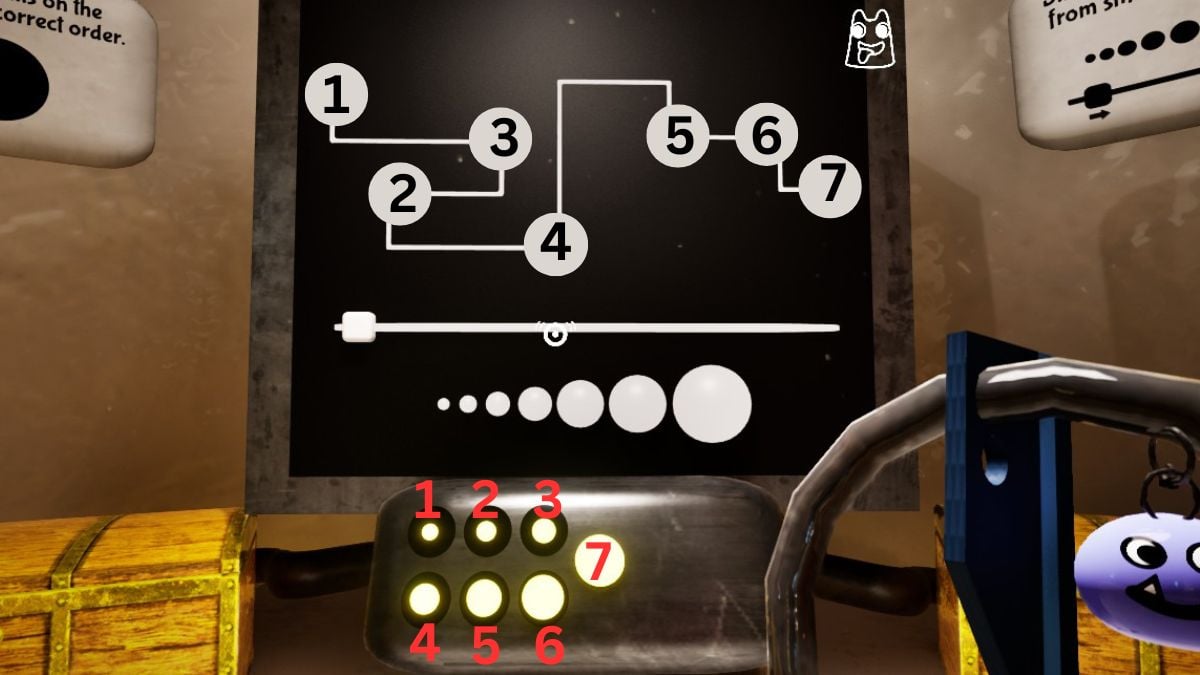


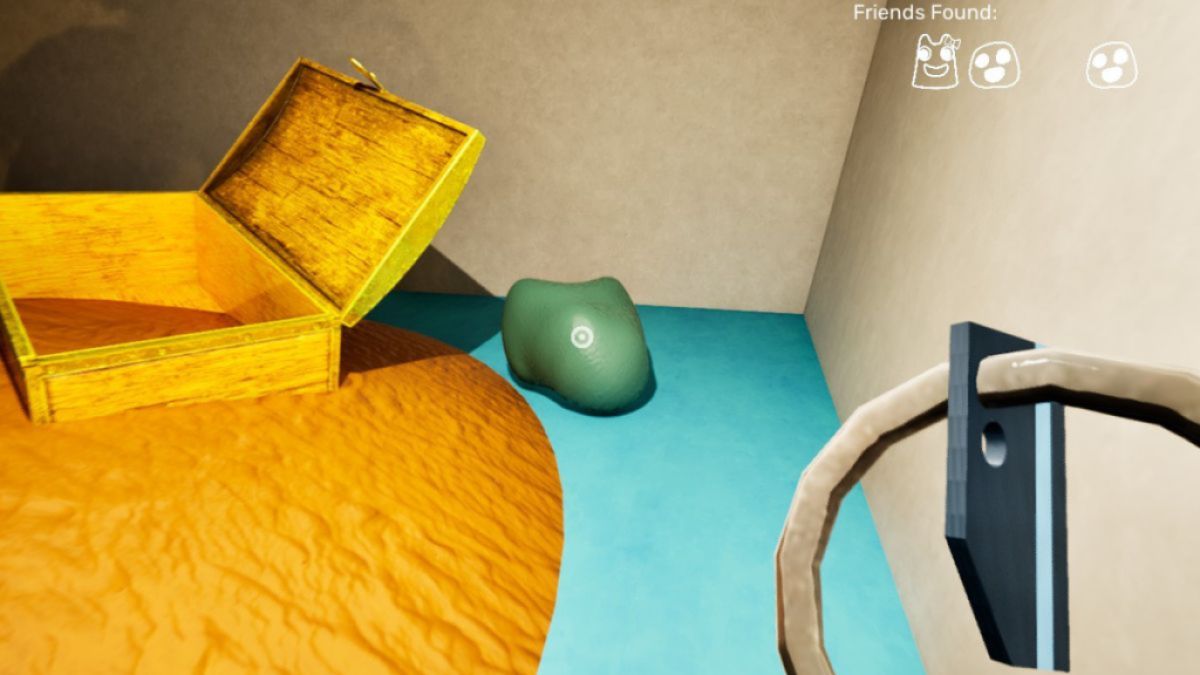
Completing the first three tests unlocks the chest on the left with an A+ Graded Paper, while the secret test unlocks the chest on the right with a Purple Keycard and a Keychain 2.
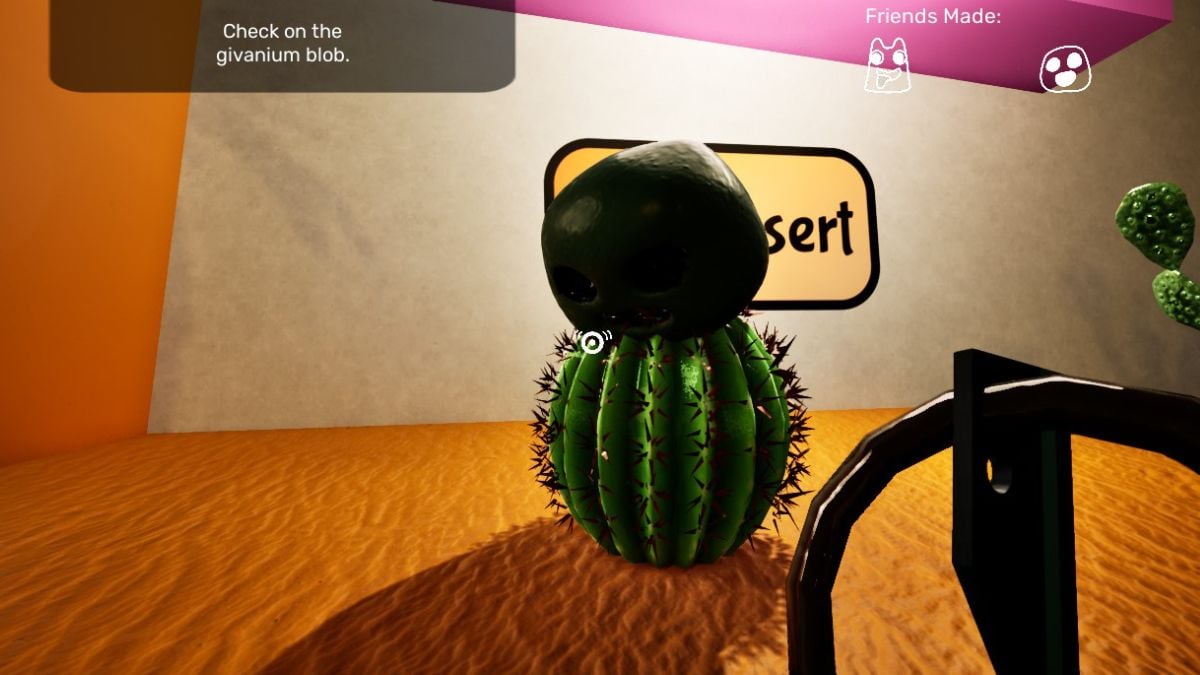
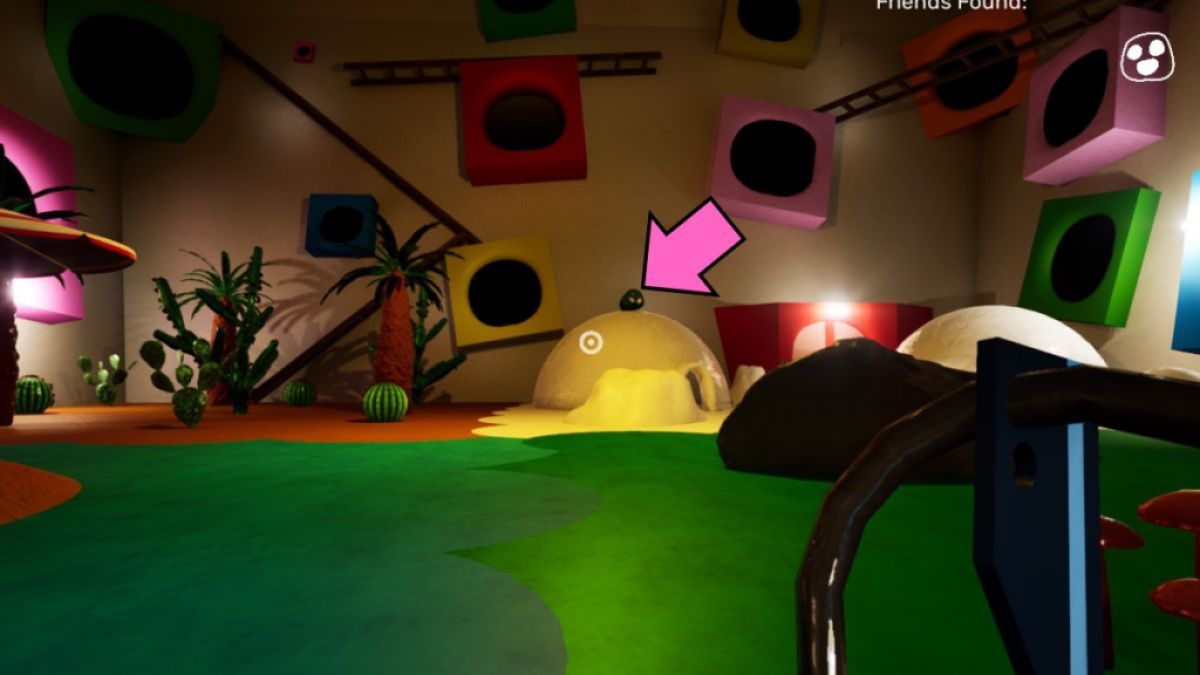
Keep going past the Exam Pod to the right and you'll see a Cactus Blob. Lovingly called that by me because when it jumps down, Banban lets it get impaled on the cactus. Check in on it, but you can't help it just yet, so move on.
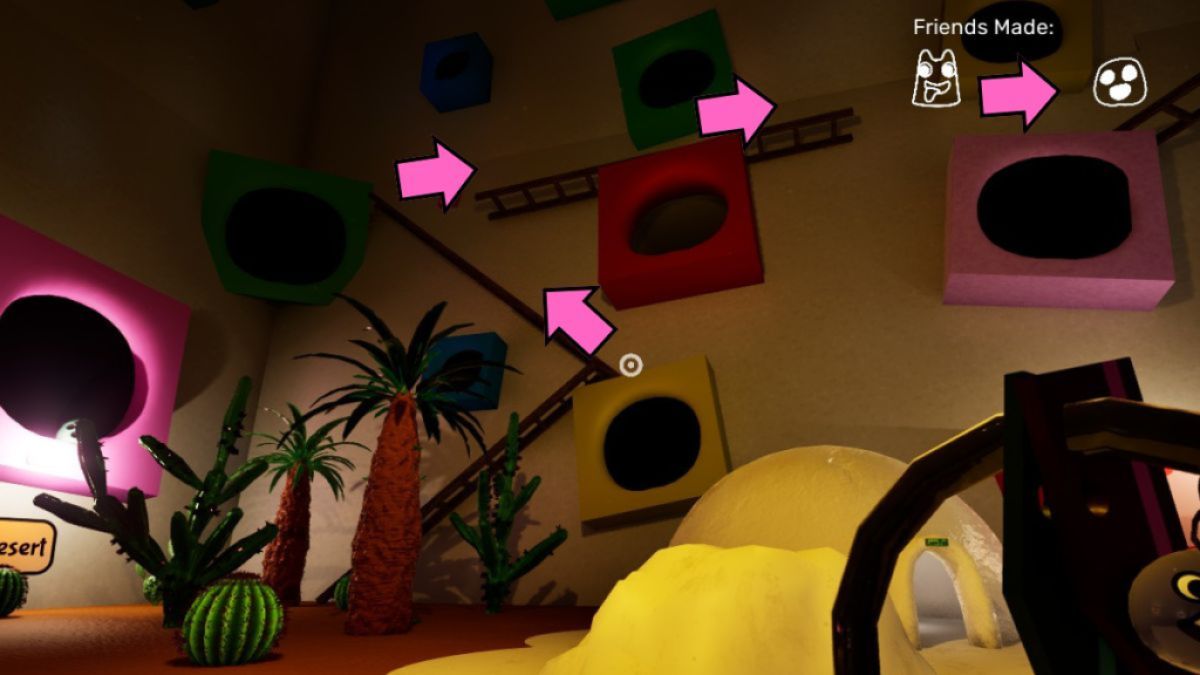
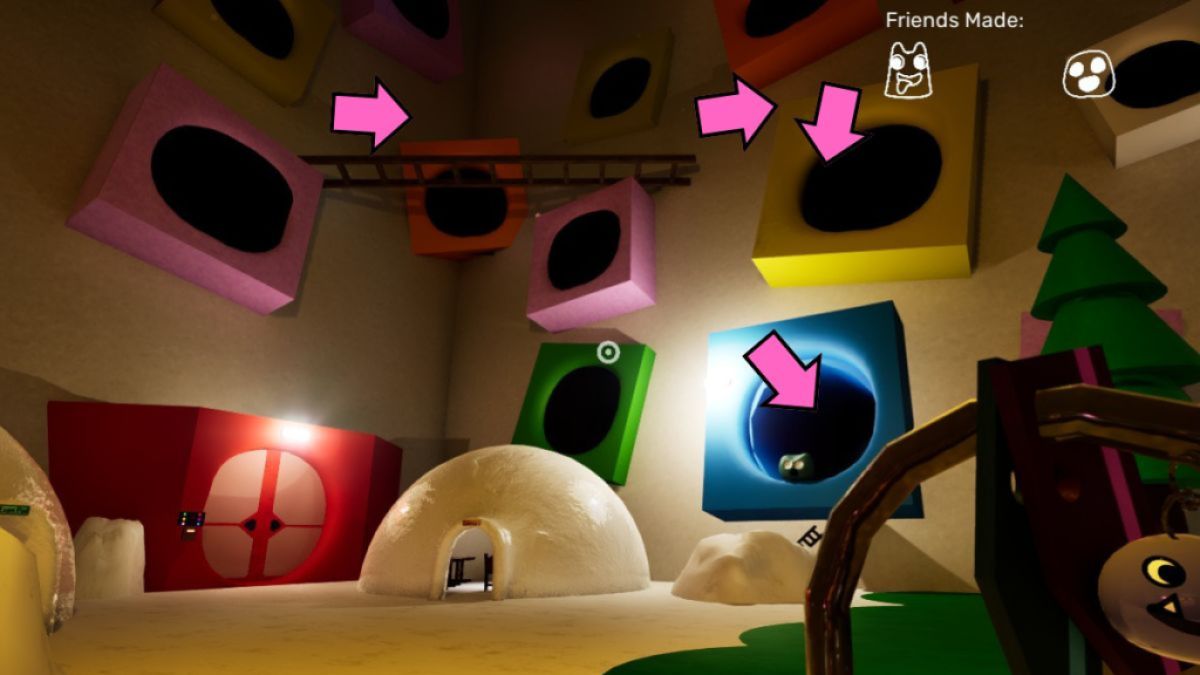
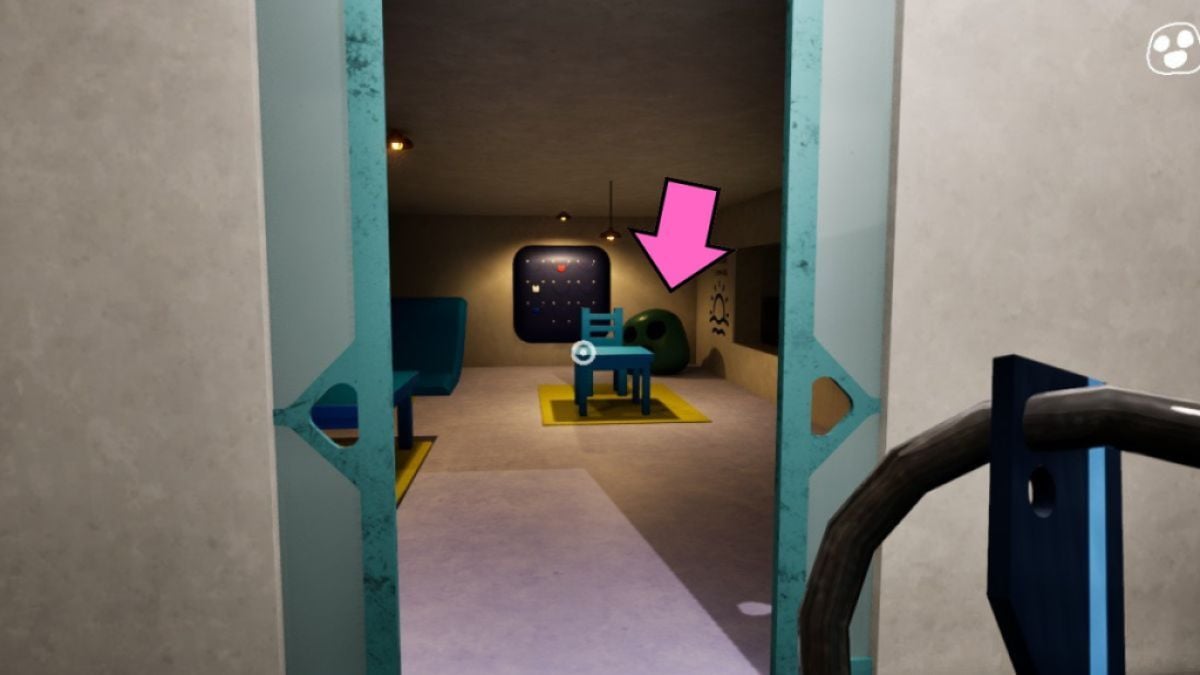
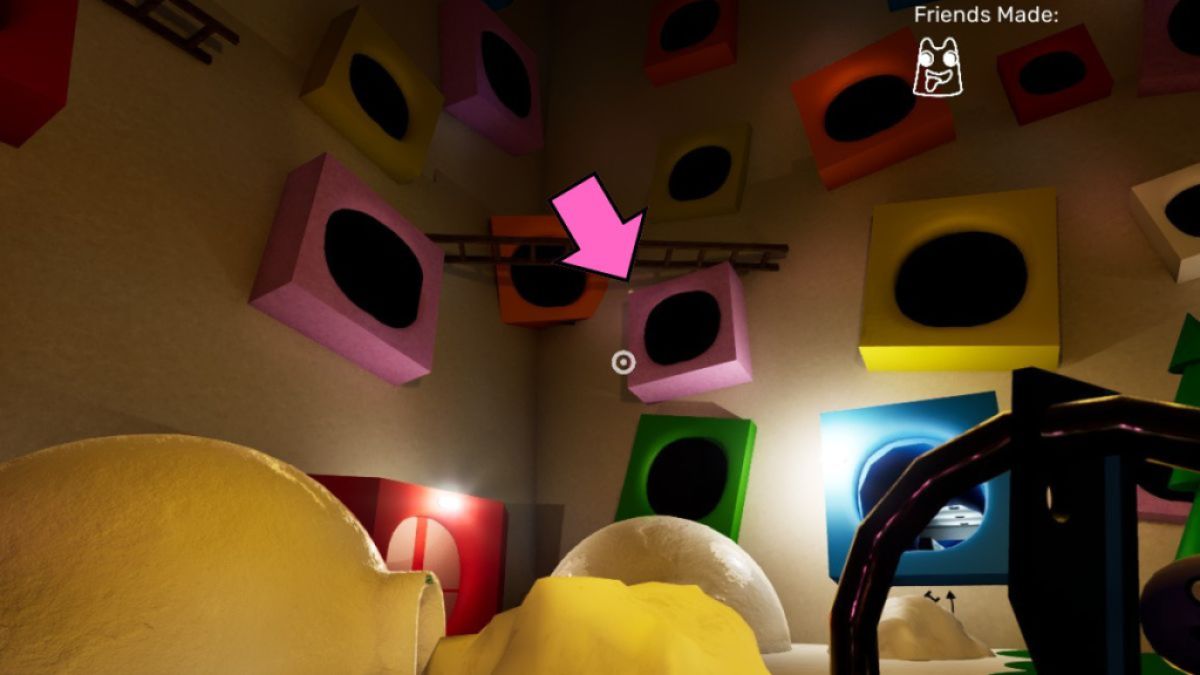
Back to the left past the Exam Pod you'll see the Ladder Blob. The hint in the name is that you need to use the ladders to get to it. It can be a bit tricky. The goal is to jump across to the yellow section above the blue and then fall down. As you're falling, you should aim for the blue tunnel where the blob was.

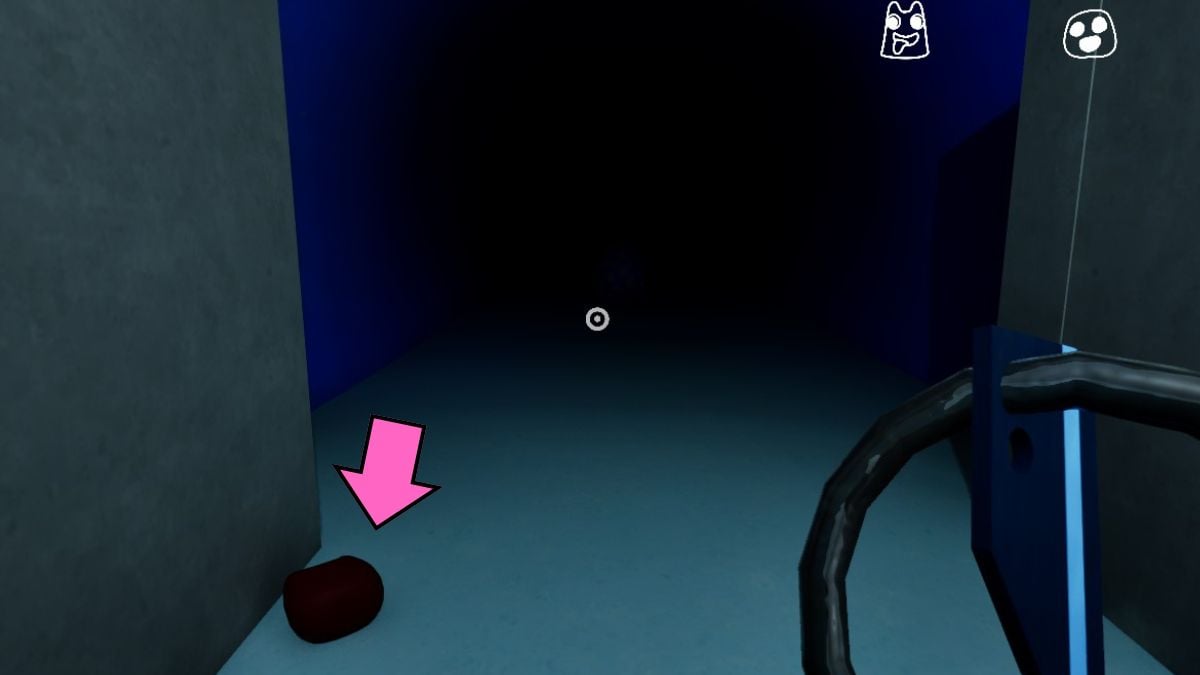
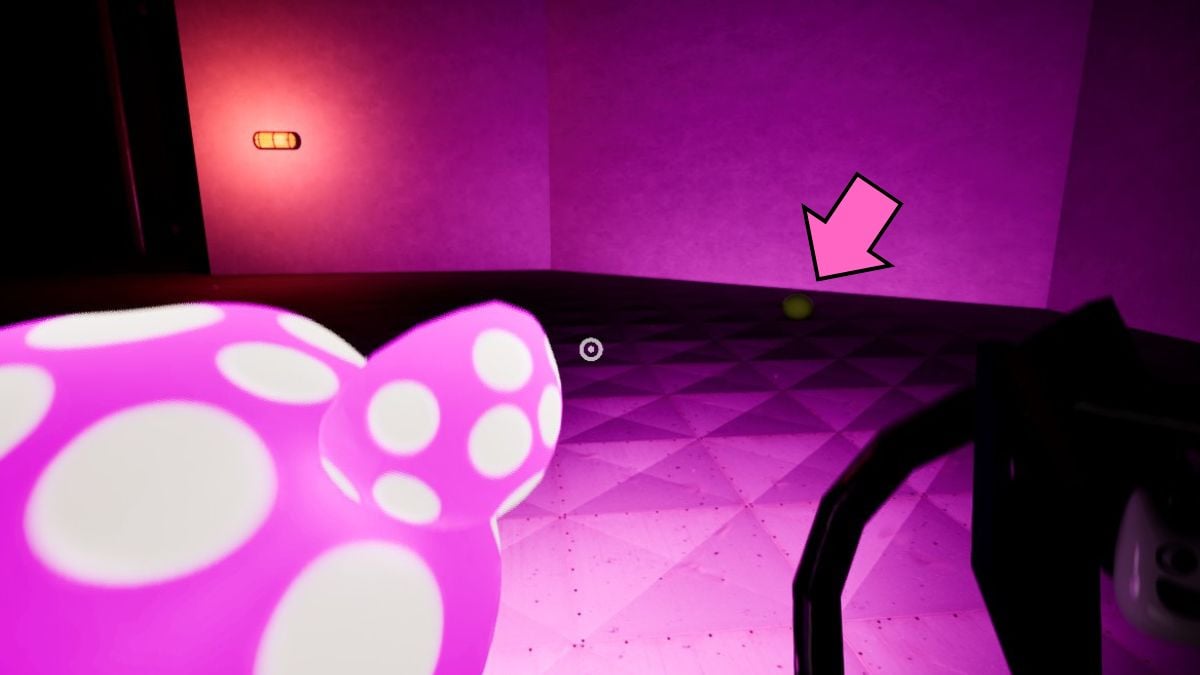
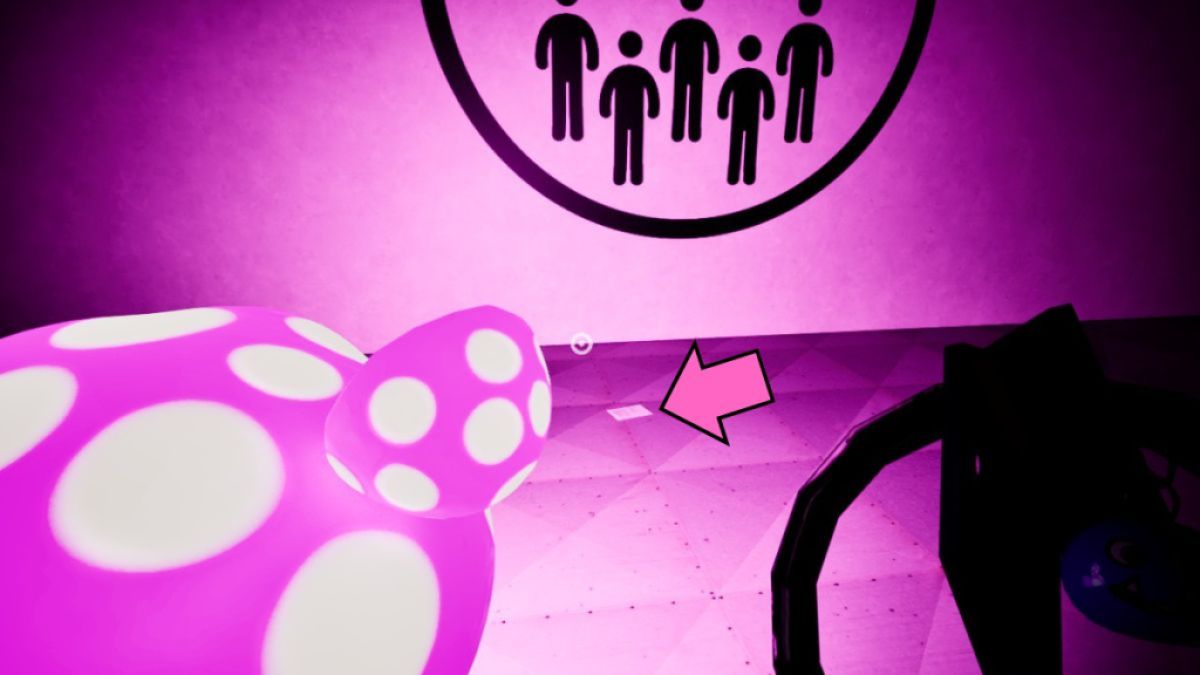
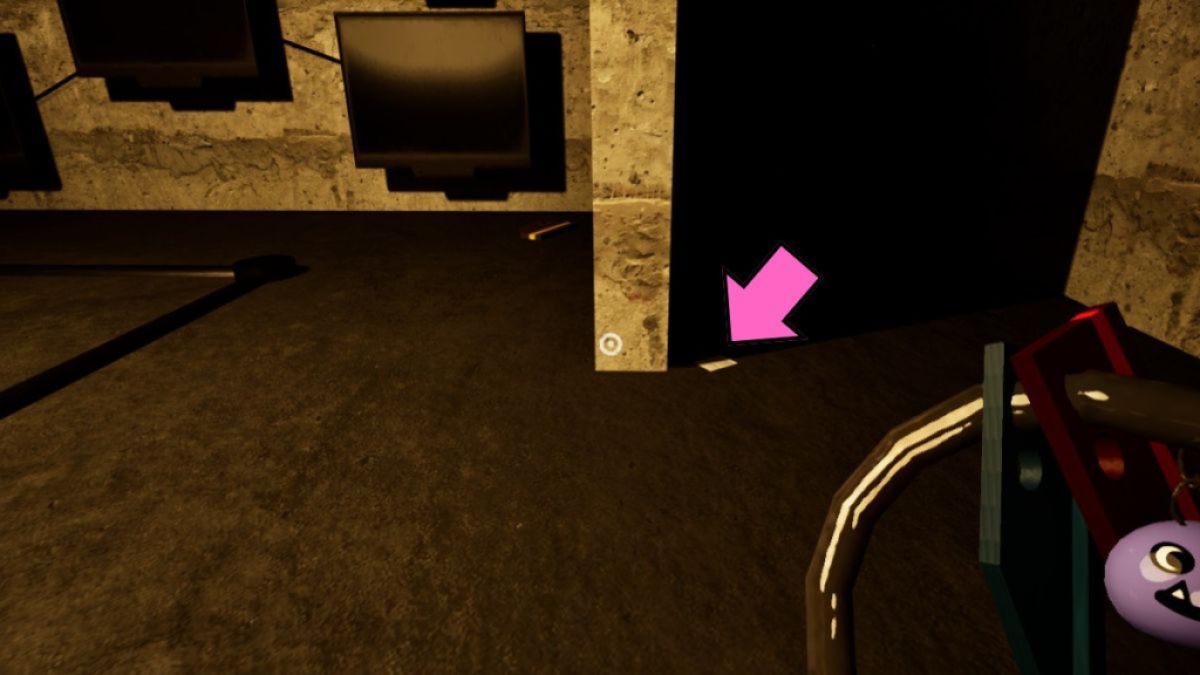
Before jumping into the tunnel, make sure to pick up the Keychain 3 from the pink square. When you're inside the blue tunnel, you'll see a little creature scuttling back into the darkness, but you can't follow it. However, do keep going as far as you can so that you can pick up Keychain 4.
Instead go into the room where the Ladder Blob is and complete the Speed challenge. You need to press on the arrow at the exact right time when the light is going to bass the bulb with the hand on it. It gets more difficult as it speeds up, but luckily it doesn't reset if you make a mistake, so you can keep trying.

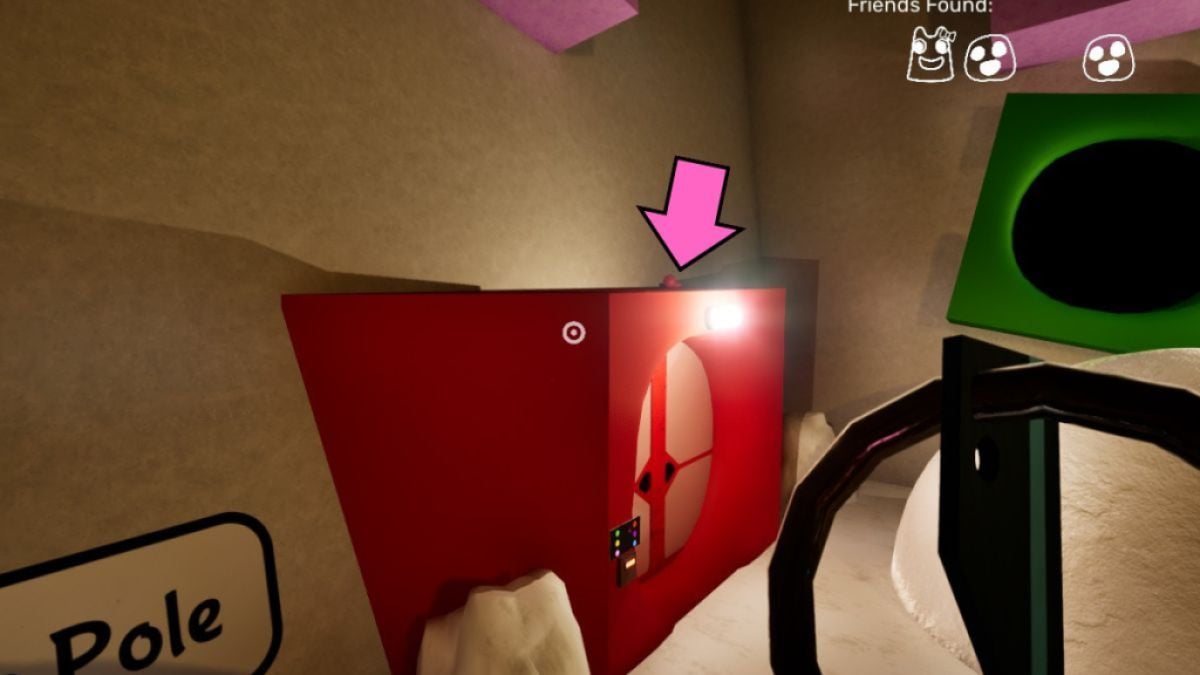
You'll unlock a guitar, and the Ladder Blob will let you take its tires. Now go across and to the left corner where two blobs are fighting over a treasure. Before doing anything else, go back up the ladder and make your way on top of the red entrance, where you'll find Keychain 5.
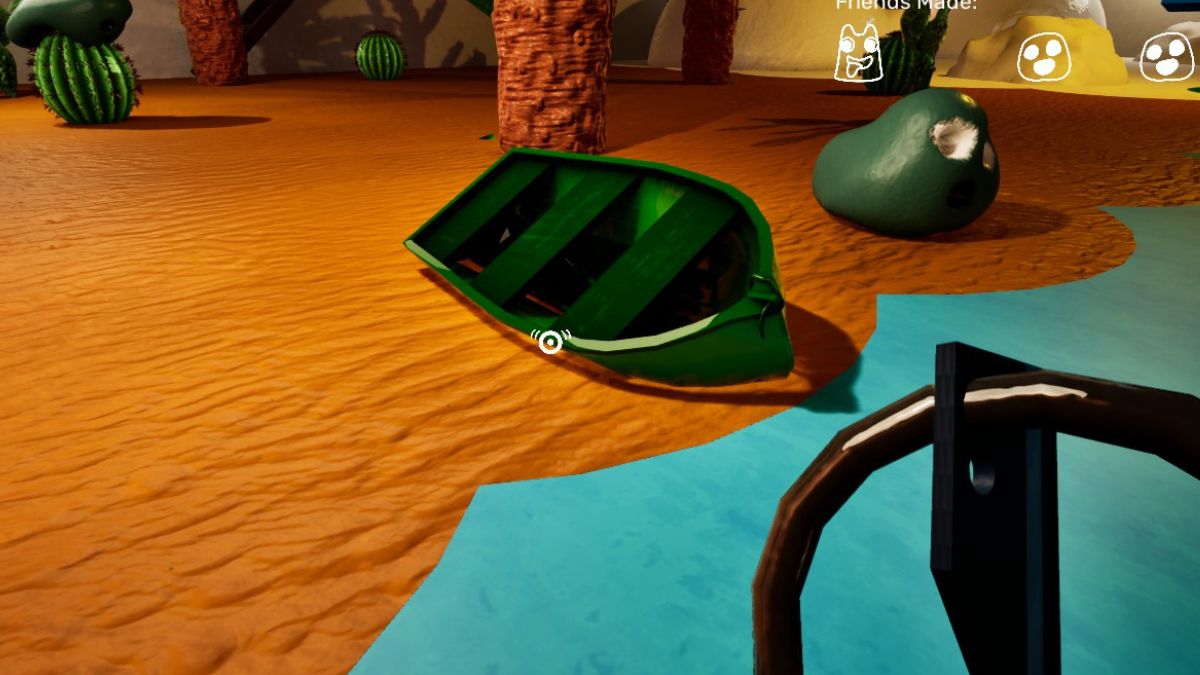
Go to the Boat Blob, add the tires to its boat and watch it go kill the other one. Once Boat Blob realizes what its done, it will give you the treasure, a Bow.
Stop by Cactus Blob first and help it get down from the cactus, then go over to Banbalena and give her the Bow and A+ Graded Paper. With that, you'll complete the make friends challenge and now it's time to play.
Go activate the Counting Corner in the common room, then head back to the middle where the characters are still talking. Once they are done, go back to the Counting Corner and you need to find where all of your new friends are hiding.
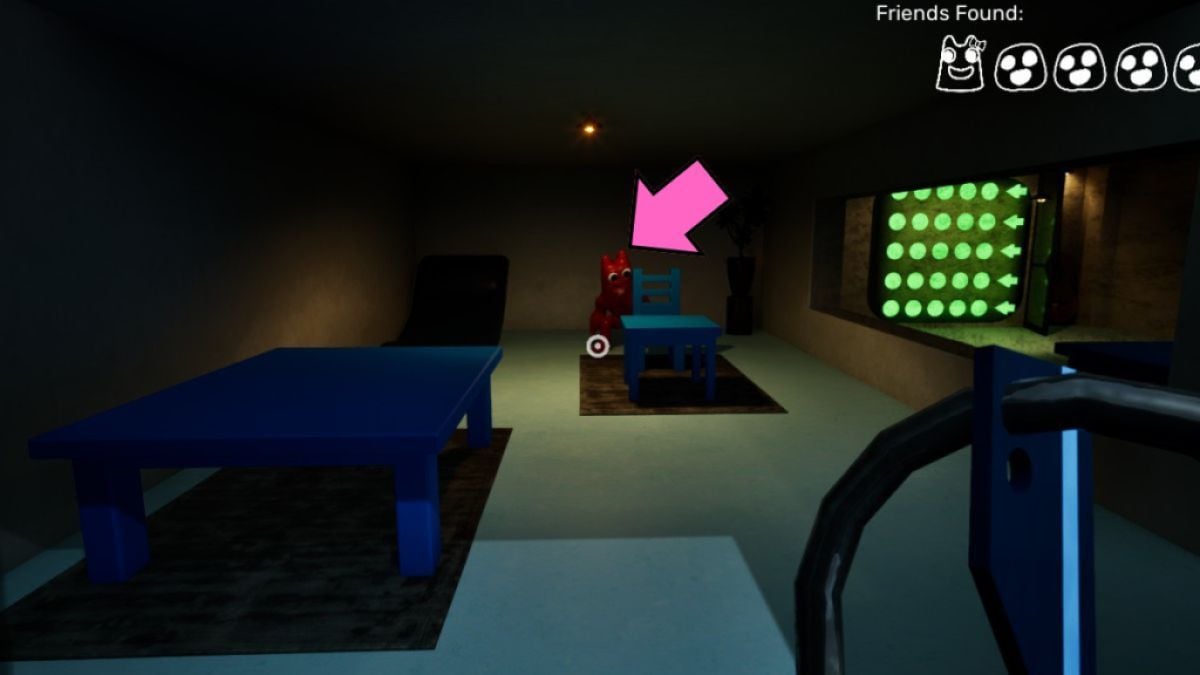

When you find everyone, Banban will suggest to play another game of hide and seek (where he shows you the worst place to hide in my opinion), but the game is stopped by Syringeon walking in and taking one of the Blobs. Instead of continuing the game, you go back to sleep.
Banban will come pick you up in the middle of the night and you have to follow him out into the common room. It's dark, but Banban has lost the Red Keycard. You need to help him look with Truffletoot, a little glowing mushroom creature that stares into your soul when you hold it and lights your way.
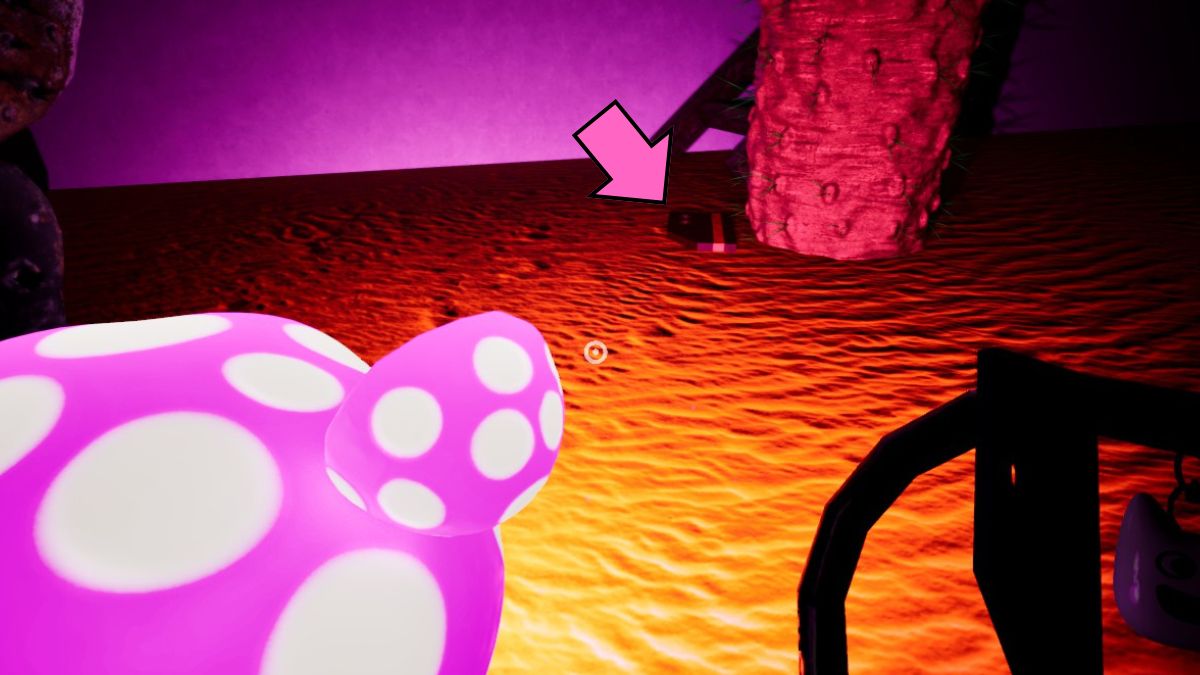
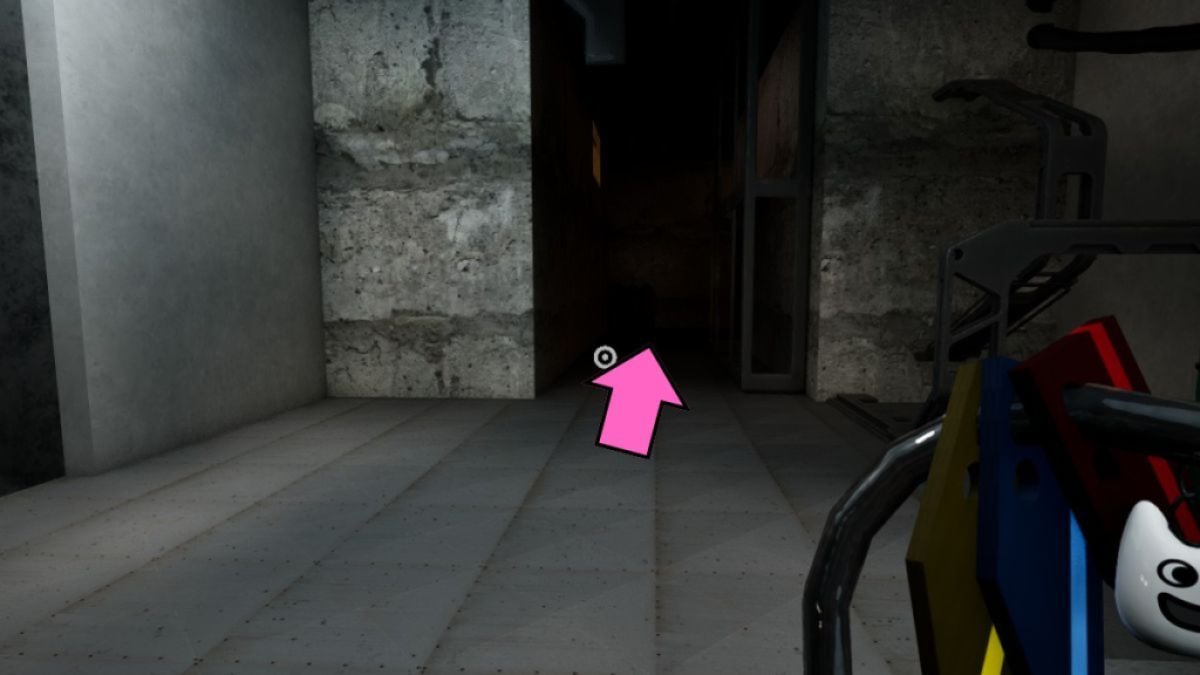
The Red Keycard is right next to the ladders on the ground, so pick it up and go back to Banban. It doesn't work but Case 8, Nabnab, will open the door for you.
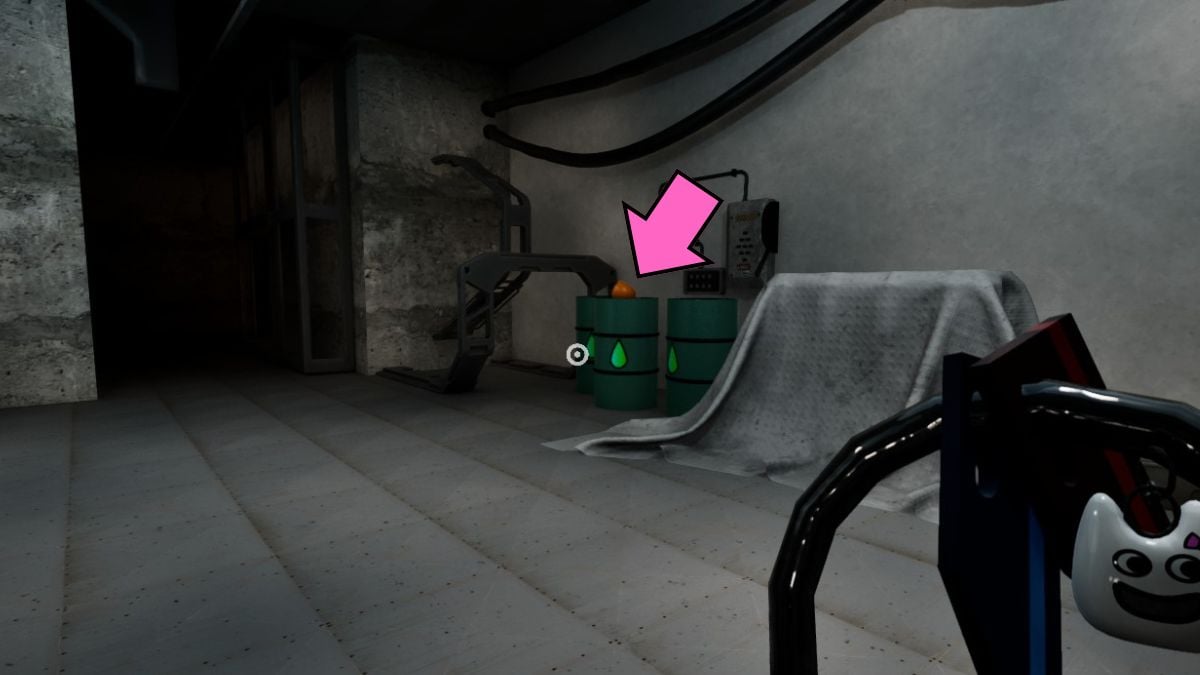
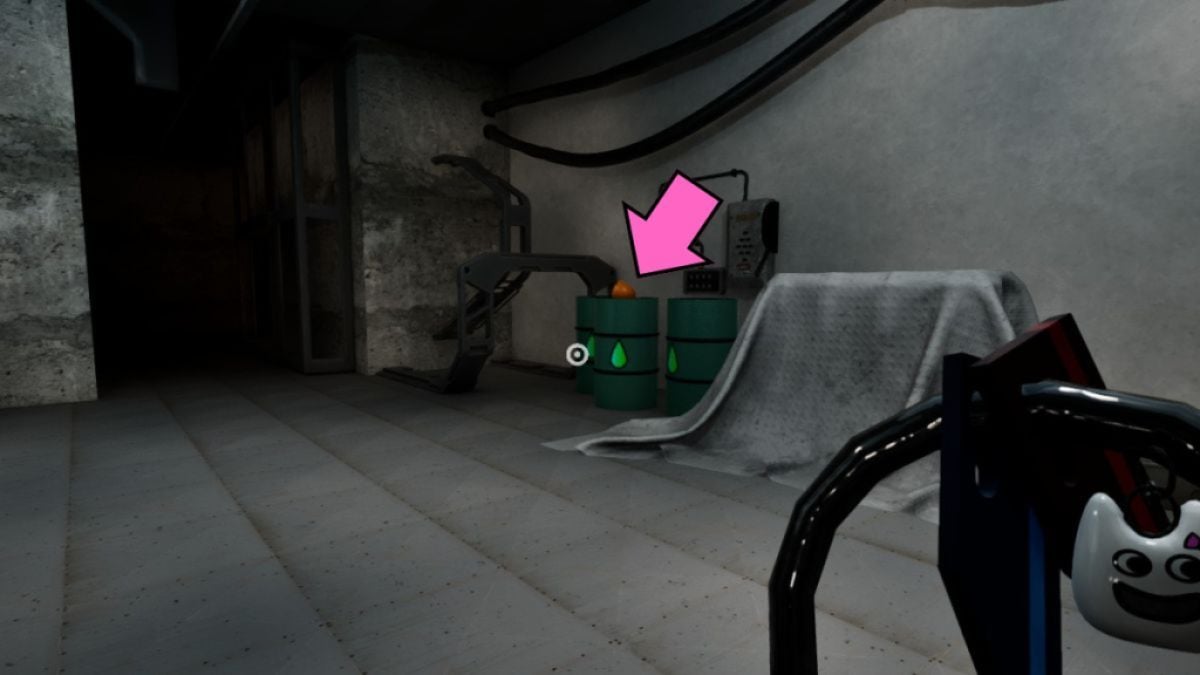
You need more people for the pressure plate, so go back the way you came and open the red door. Head down to the right for now and pick up a Keychain 8 from the barrels. You'll find yourself locked in a room with Bittergiggle.
Bittergiggle is strapped to a bed while gas flows into the room. There's a Yellow Keycard on the floor, but you first need to stop the gas and save Bittergiggle in Garten of Banban 0.
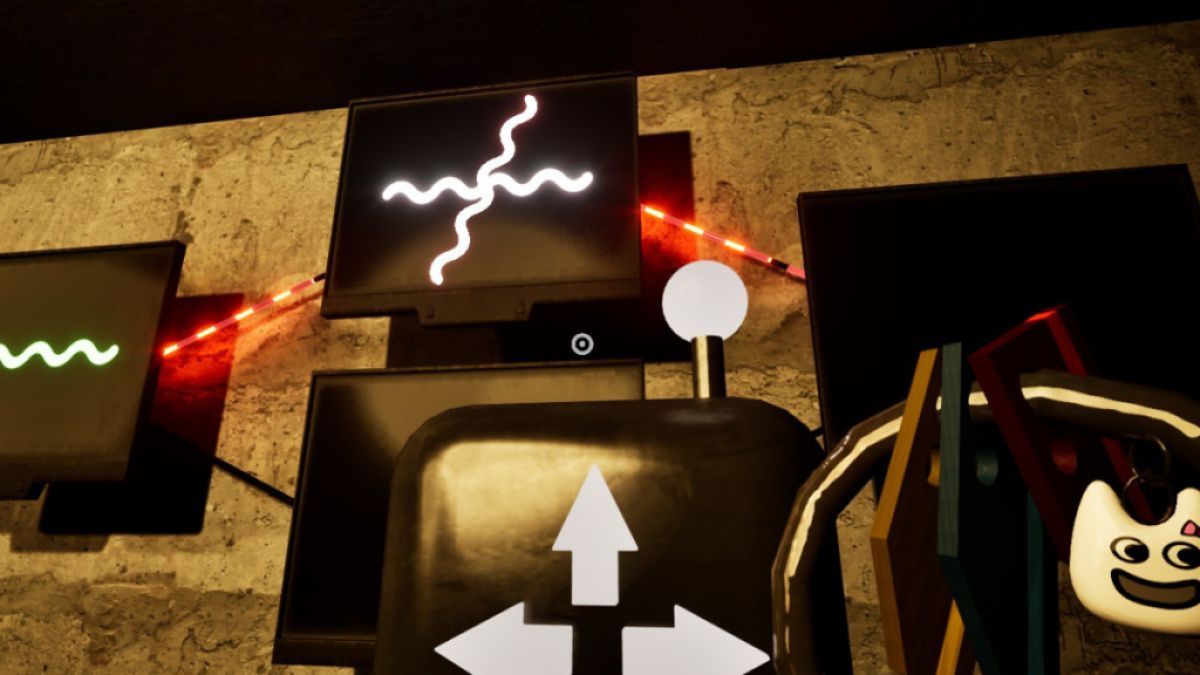
The process was confusing to me a little bit. You can move the panel where you want, its location doesn't affect what you do, so move it where you can easily see the screen you are working on. The screens are connected by wires and some of them are broken. You need to avoid the broken screens while matching the frequencies on the others.
The frequency that goes up and down is pretty easy to match, just when they connect you press the up arrow on the panel. However, the frequency where one rotates requires some timing. Press it when there is a little bit of space right before the two lines connect. Repeat this until you reach the end.
With Kittysaurus joining you from the boxes, you now have enough people to open the door. You stand in the middle where Banban set you up to be eaten by Ramamba, but luckily Nabnab saves you. Follow Bittergiggle on his search to find Kittysaurus and watch them get eaten. Go back to Banban and Truffletoot, but you'll fall into a cave.
Banban will go one way, while you and lit up Truffletoot go the other way. Keep running and jumping across the uneven path. The goal is to keep moving until you reach a stone wall. Ramamba will attack you but Banban (6b Hellish version) shows up and has an epic (sorta) fight with the Ramamba.

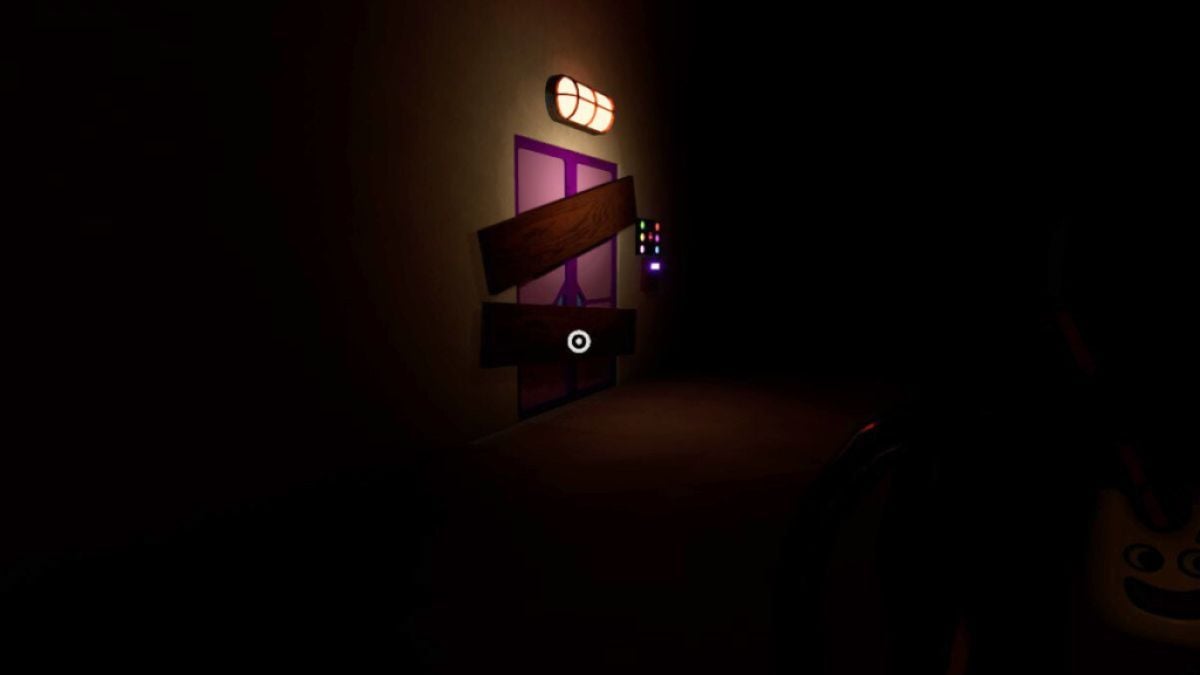
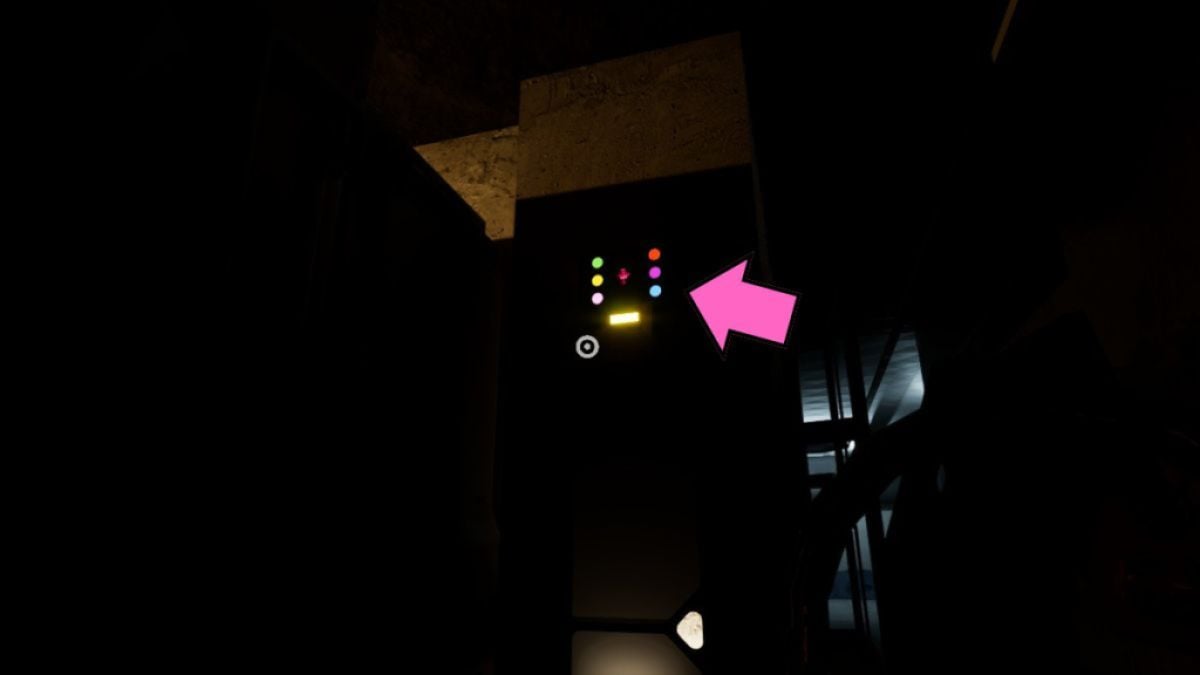
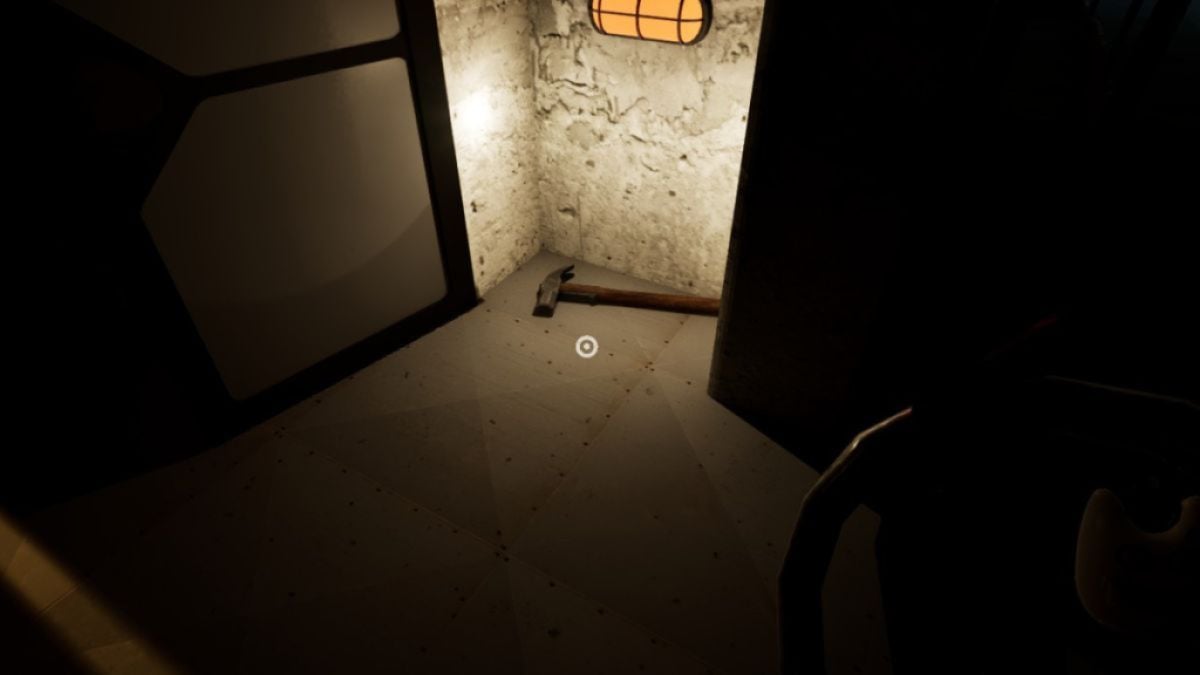
Before approaching the dead Ramamba, instead make your way up the ladders yet again. This time you're supposed to go down the red tunnel where you'll find a boarded up door with a keycard reader. Use the Hammer to remove the boards, then use the Purple Keycard to unlock the door and you'll meet Slow Seline in Garten of Banban 0.
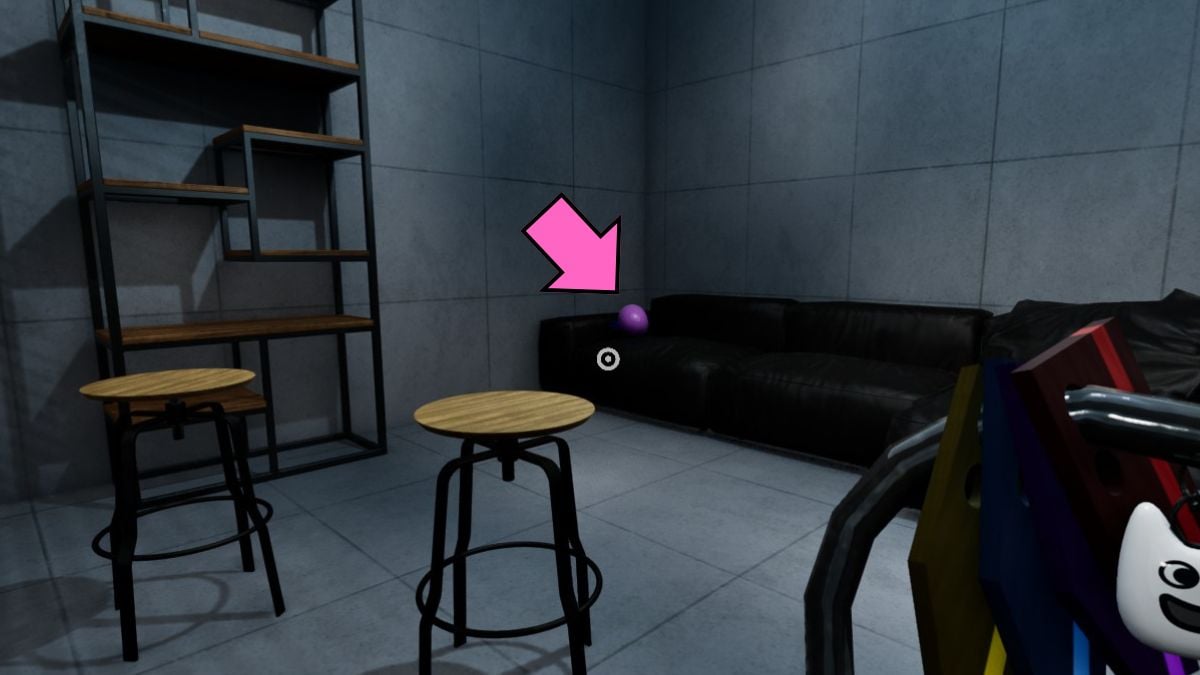
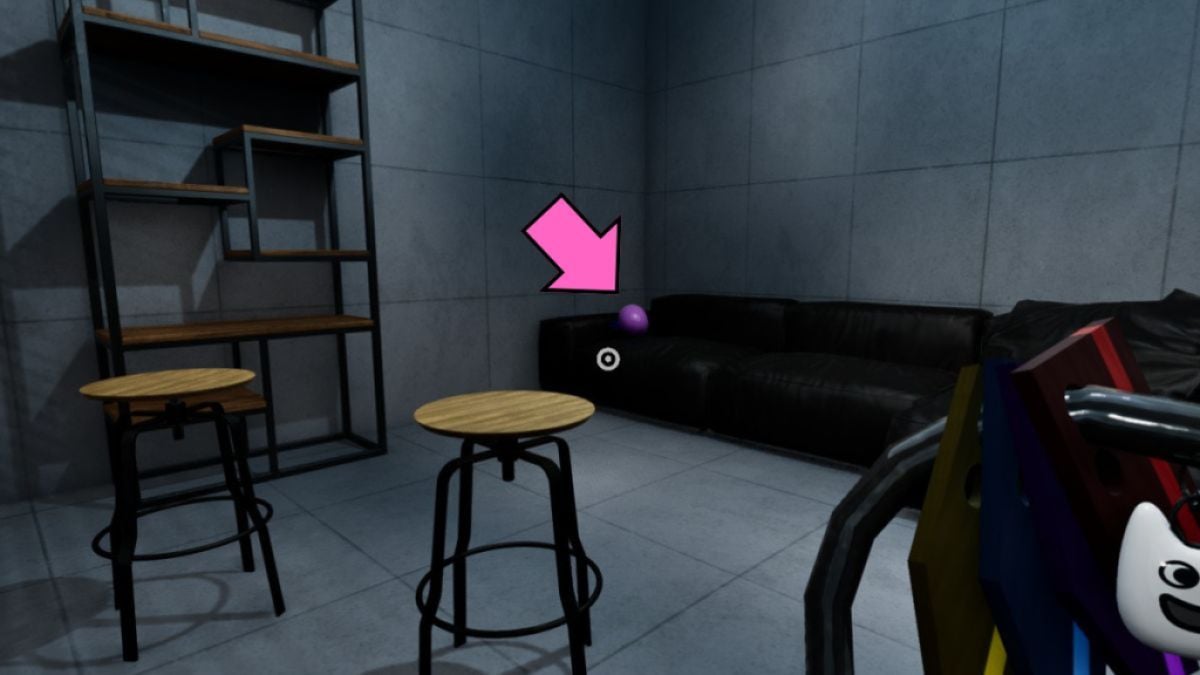
When you have it, go to Banban (normal again) and he will start another game of hide and seek, taking you to a closet to hide. Before you do, pick up the Keychain 9 on the couch to the left to complete your collection. Now go into the closet where Flumbo will remain for many years to come.
There are two types of collectibles you can find in Garten of Banban 0: Keychains and Journals. Here is exactly where to find all of them so that you can get all the achievements.


| Keychain | Location |
|---|---|
| Keychain 1 | In the hallway to the right outside your room. |
| Keychain 2 | In the right chest after you complete the secret fourth test. |
| Keychain 3 | On the pink square underneath the ladder. |
| Keychain 4 | In the blue tunnel on the ground |
| Keychain 5 | On top of the red entrance. |
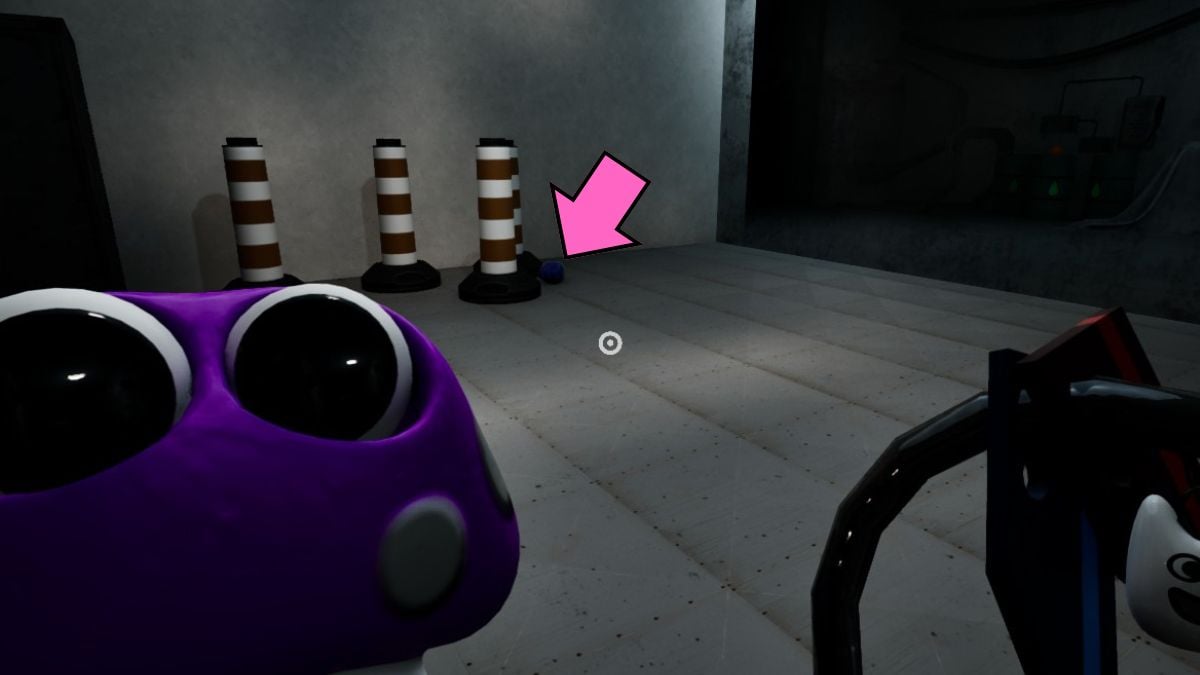
| Keychain 6 | Next to the cones in the hallway during the night. |
| Keychain 7 | On the floor in the room with the large door. |
| Keychain 8 | On the barrels in the room with the red door. |
| Keychain 9 | On the couch in the room with the closet. |

| Journal | Location |
|---|---|
| Journal 1 | In the Classroom Pod. |
| Journal 2 | In the Ladder Blob room. |
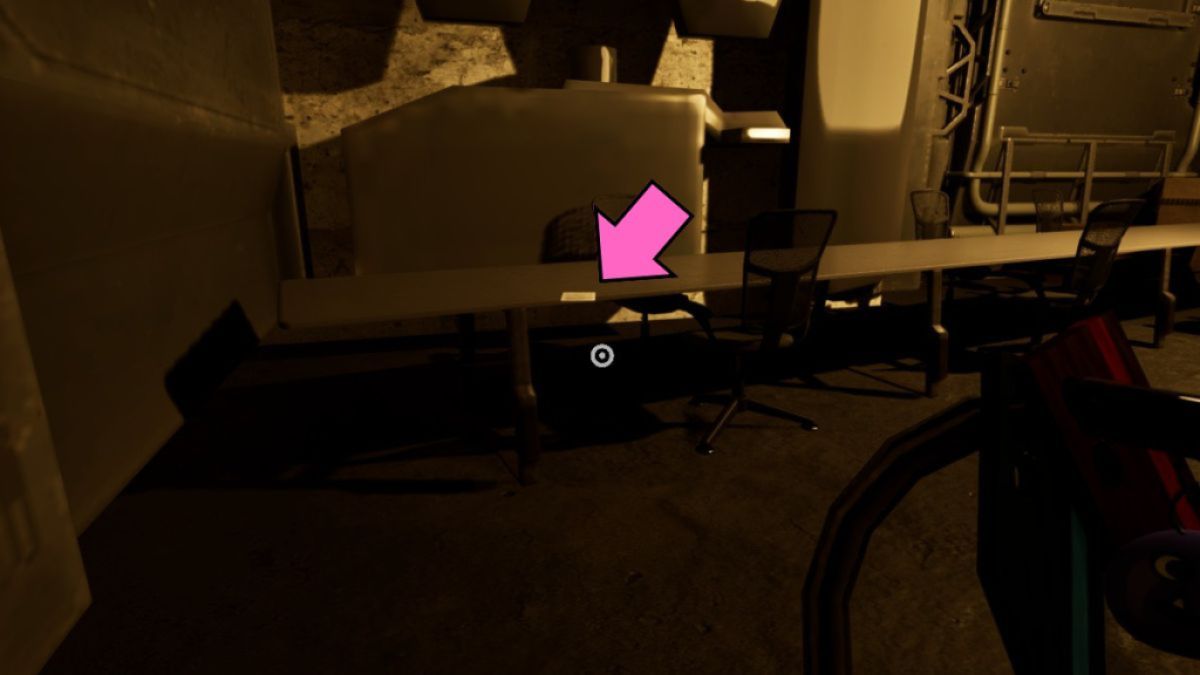
| Journal 3 | On the floor in the big room. |
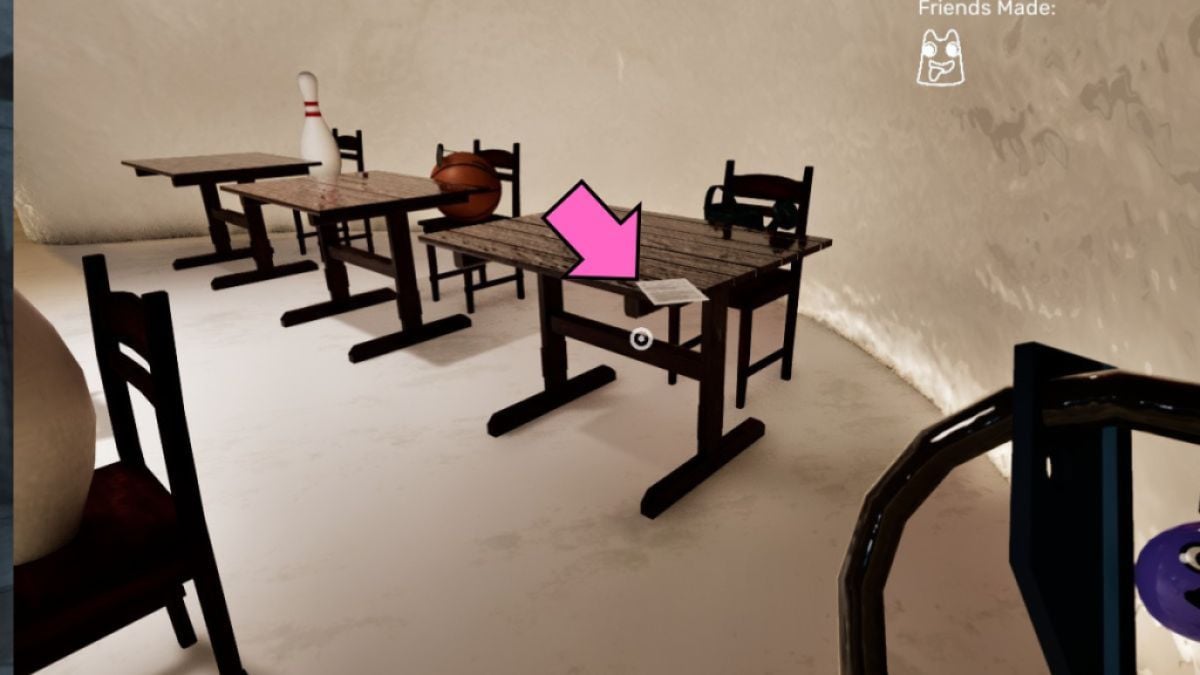
| Journal 4 | On the table in the red room. |
| Journal 5 | On the ground in the gas room. |
| Journal 6 | On the table in the Slow Selene secret room. |
If you're looking for more horror games, you can check out our Poppy's Playtime Chapter 4 Full Walkthrough on Pro Game Guides.